How to Set Up and Use NordVPN on MikroTik (2026 Guide)
NordVPN is compatible with many devices. It has custom applications for major platforms like Windows, iOS, macOS, Android, and Linux. For other devices it supports, there are several guides users can follow on its website to install its software on such devices. With the introduction of RouterOS version 6.45, NordVPN can as well support MikroTik routers.
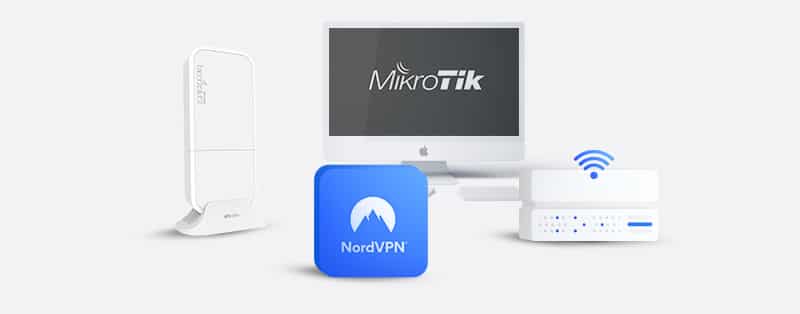
MikroTik is a company that has consistently delivered premium hardware and software for routers, network switches, and access points. Using NordVPN with it comes with great benefits. However, it is not easy to set up NordVPN on this router model. You either need to have technical knowledge or follow an accurate technical guide. This article provides a guide that can help users without the technical expertise set up and use NordVPN on MikroTik routers.
Get NordVPN for Mikrotik Router
Setting Up NordVPN on MikroTik
NordVPN users with a MikroTik router running on RouterOS version 6.45 and later can now create a secure IKEv2 VPN tunnel to a NordVPN server of their choice using EAP authentication. The following is a step-by-step process you can follow in setting up NordVPN on a Mikrotik router:
1. The first step to take is to get a NordVPN subscription if you do not have one already.
2. Get access to Mikrotik’s RouterOS settings through the terminal. There are several ways you can access the console terminal, including through a serial port, telnet, SSH, or Winbox. If you don’t know how to access the terminal, it is best to reach out to Mikrotik support, or check the user manual of the router, or visit Mikrotik’s website for help.
3. Once you have access, you need to download and import NordVPN’s root CA certificate. You can do this by typing and running the following commands in the terminal:
/tool fetch url=”https://downloads.nordcdn.com/certificates/root.der”
/certificate import file-name=root.der
4. You can confirm if you successfully imported the certificate by running the following command:
/certificate print where name~”root.der”
Under “COMMON-NAME,” you should see “NordVPN Root CA.”
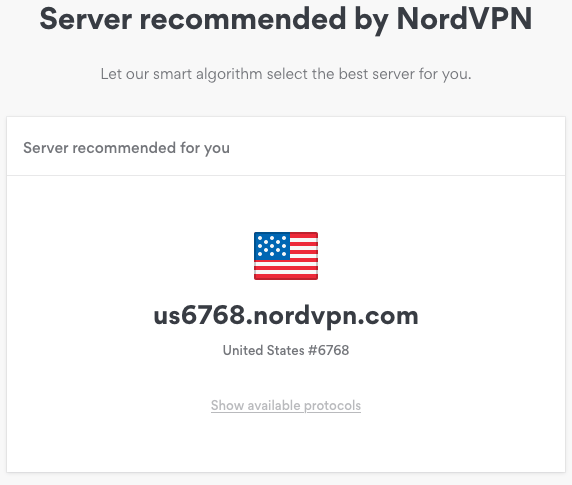
5. The next step involves getting the hostname of the server you intend to use. NordVPN can recommend the best server to use based on your location. Just go to this page and adjust the preferences to suit your needs. The hostname is under the flag of the country the server you select is based. For example, in the image below, it is “us6768.nordvpn.com.”
6. Afterward, you have to establish the IPsec tunnel. MikroTik believes that it is better to set up a separate Phase 1 profile and Phase 2 proposal configurations. This is to prevent interference with any current or future IPsec configuration. To create these configurations, enter the following commands in the terminal:
/ip ipsec profile
add name=NordVPN
/ip ipsec proposal
add name=NordVPN pfs-group=none
7. The next step is to create a new policy group and template. MikroTik recommends doing this instead of using the default policy template to generate policies so that you can have a unique IPsec configuration. Enter the following commands to establish a policy group and template:
/ip ipsec policy group
add name=NordVPN
/ip ipsec policy
add dst-address=0.0.0.0/0 group=NordVPN proposal=NordVPN src-address=0.0.0.0/0 template=yes
8. Creating a new mode configuration entry is the next thing to do. The “responder” parameter must be a value of “no” in the new entry. Enter the following commands in the terminal:
/ip ipsec mode-config
add name=NordVPN responder=no
9. Next on the list is establishing peer and identity configurations. Entering the following details will establish a connection:
/ip ipsec peer
add address=lv20.nordvpn.com exchange-mode=ike2 name=NordVPN profile=NordVPN
/ip ipsec identity
add auth-method=eap certificate=”” eap-methods=eap-mschapv2 generate-policy=port-strict mode-config=NordVPN peer=NordVPN policy-template-group=NordVPN username=YourNordVPNServiceUsername password=YourNordVPNServicePassword
It is important that you do not forget to insert your NordVPN credentials beside “username” and “password.” If you do not know your credentials, you can head over to your Nord Account dashboard to copy them.
10. You can verify the connection works or is successful by inputting the following commands:
/ip ipsec
active-peers print
installed-sa print
11. The next step involves deciding what to send through the VPN tunnel. This is important because it determines what will be protected by the VPN tunnel. Some people might want to protect every IP address or subnet in their network, while others might have a specific IP address range or just a single IP address. For example, if you have a local network 192.168.1.0/24 and you want every device on the network to go over the encrypted tunnel, you will need to create a new IP/Firewall/Address list that your local network is a part of. Let’s take a look at the configuration:
/ip firewall address-list
Add address=192.168.1.0/24 list=local
Using a single or multiple IP addresses instead of the network address will look like this:
/ip firewall address-list
add address=192.168.1.120 list=local
add address=192.168.1.80 list=local
You then need to attach the IP/Firewall/Address list to mode config configuration:
/ip ipsec mode-config
set [ find name=NordVPN ] src-address-list=local
12. Lastly, enter the following command to verify that the right source NAT rule is dynamically created when the tunnel is set up:
/ip firewall nat print
Suppose you diligently follow these 12 steps (11 for those who already have a NordVPN subscription). In that case, you will successfully set up and use NordVPN with your MikroTik device running RouterOS version 6.45 or later.
Get NordVPN for Mikrotik Router
Advantages of Using NordVPN on MikroTik
Using NordVPN on MikroTik routers is a case of premium meets premium. NordVPN establishes a secure way to surf the internet, and MikroTik invests in producing premium hardware providing network solutions. There are several benefits users of MikroTik stand to gain. Let’s take a look at some of these benefits.
1. Security
Security is the essential purpose of having a VPN protect your devices connected to the internet. NordVPN has basic and advanced features to ensure a tight security perimeter. When you use it with MikroTik, you reduce the risk of data exposure or ISP tracking on every device connected to your router.
NordVPN encrypts all your connections with AES-256 encryption. Security analysts recommend this encryption because it is practically unbreakable. NordVPN’s advanced features include Double VPN, Onion over VPN, Split Tunneling, a Kill Switch, and leak protection. It also has a CyberSec suite that protects your devices from malicious sites, phishing scams, and ads. It can also prevent your devices from partaking in any DDoS (Distributed Denial-of-Service) attack.
2. Privacy
NordVPN also protects your privacy, especially in regions with heavy monitoring and restrictions. Due to its location in privacy-friendly Panama, spying governments cannot get a hold of your data. Alliances like the 5/9/14 Eyes work together by sharing surveillance information. Since they have no jurisdictional authority over Panama, your data remains at little or no risk of unwanted access.
Also, NordVPN allows users to pay in cryptocurrency. This will enable you to successfully stay anonymous because billing information can sometimes include information like your home address and that anyone with access to that information can track you.
3. Unrestricted Access
Another popular reason why people use VPNs is to circumvent geo-restrictions on content outside their countries or continent. Due to licensing issues, the contents of several platforms and sites are only available locally or regionally. People in countries outside the boundaries of such restrictions cannot access those platforms. NordVPN has proven beyond doubt that it has excellent capabilities in bypassing such restrictions.
No one can dispute its presence globally; it has more than 5000 servers spread across 59 countries. With a subscription, you have access to every single server. This means that you have unrestricted access to platforms like Netflix, Hulu, BBC iPlayer, and several other international streaming platforms. When you use it with a router, you can also bypass the six-device simultaneous connection limit and use it on devices that don’t have custom applications.
4. Reliable Customer Support
Customer support is an essential service VPNs render to their users. It can determine if users will continue to use a VPN service or not. NordVPN’s support structure includes a 24/7 live chat system, a chatbot, a ticketing system, a help center, FAQs, and instructional material on its website. This is to ensure that if you encounter any issues configuring NordVPN on your MikroTik router, you have access to a reliable system and knowledgeable customer support agents to help you out.
Why Is My NordVPN App not Working? Quick Tips To Solve The Issue
If you are having some challenges with NordVPN working correctly on your MikroTik router, here are simple steps you can follow to resolve the issue:
1. Check Your Internet Connection
First off, you will need to ensure that you have a stable internet connection. To do this, you could simply disconnect and reconnect to the internet or visit speedtest.net to run a quick speed test. Naturally, the faster your internet speed is, the more stable your connection will be.
3. Check Your Server Location
If you check your connection and there’s no problem with it, then chances are that the server you’re connected to is congested or far away that it causes your network to lag. However, NordVPN offers more than 5500 servers worldwide, which means that you have multiple options. If you’re having an issue with one server, you can simply switch to another.
You should download as many configuration files as you may need. So that you can easily use them when you want, instead of heading back to NordVPN’s website to download a server configuration file each time you want to connect to a new location. Also, it’s important to note that when you connect to a server closest to your location, you’re sure to enjoy a faster internet connection.
3. Verify Your NordVPN Credentials
One common cause for problems connecting NordVPN with a MikroTik router is entering the wrong account credentials. Therefore, you should always ensure that you cross-check the credentials you’ve entered are the same as the one you registered with because this could be the cause of the problem you’re faced with.
If you try all of these methods and none of them fixes your connection, you could always contact NordVPN’s customer care service for assistance. They typically respond fast and offer a great deal of help.
Frequently Asked Questions About How to Set Up and Use NordVPN on MikroTik (2026 Guide)
What subscription plans are available for MikroTik routers on NordVPN?
NordVPN has a variety of subscription packages that are suitable for its users. These packages include:
1. 1-month Plan
This is the shortest duration available on NordVPN. The 1-month plan is a popular choice among newbies or people that don’t need VPN services for a long time. Even though you only get access to NordVPN’s services for a short time, you still get all premium features. The 1-month plan costs $11.95 monthly.
2. 1-year Plan
If you’re looking to use NordVPN on your MikroTik throughout the year, the 1-year plan is an excellent offer. You get to pay $6.99 monthly.
3. 2-year Plan
The 2-year plan saves you up to 58% of the original plan. It is a significant discount offer that will cost you only $119.76 at the end of the plan.
4. 3-year Plan
This is the most extended package, and it offers the most discount. You get to 70% of the original price. This means that you pay $3.49 monthly, and $125.64 in total.
However, NordVPN comes with a 30-day money-back guarantee on all its plans.
Can I use a free VPN with MikroTik?
Yes, you can, but it is not advisable. Free services don’t offer the best security and privacy features. For example, the VPN you use may have a weak or no encryption protocol. In addition, a free VPN may expose your router network to malware, trackers, viruses, and other cyber threats. Your activities may also be recorded because some free VPN providers don’t have a strict no-log policy. So, it would be best if you opted for paid VPNs.
However, you can use premium services like NordVPN risk-free. This means that thanks to its 30-day money-back guarantee, you can use the VPN for a while and request a full refund.
Conclusion
Setting up NordVPN on MikroTik routers is certainly more technical than using NordVPN’s custom software application. Fortunately, this article’s step-by-step process empowers users without the technical knowledge to set it up on their MikroTik routers. This gives them access to the benefits of using a premium VPN service provider like NordVPN on a premium hardware provider like MikroTik.