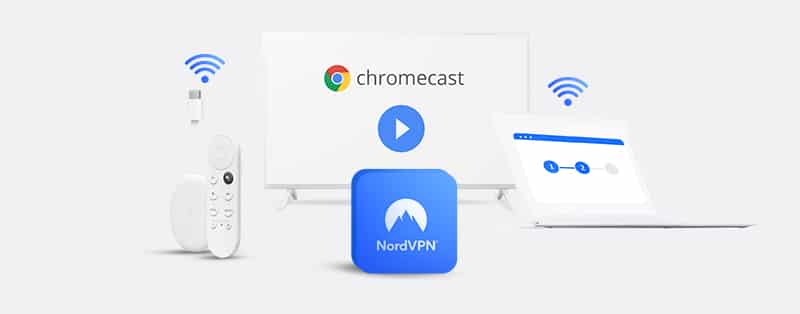
How to Setup and Use NordVPN on Chromecast (2026 Guide)
NordVPN is one of the several VPN service providers that avail their subscribers the privilege of connecting multiple devices for a single subscription package.
With the new heights that Google has taken streaming services, the launch of the first-generation Chromecast devices in 2013 was the beginning of a new era for entertainment over the internet. Chromecast devices allow users to stream local content (audio and video) from the internet. It also permits a user-friendly casting to your not-so-smart TV, with an added advantage of playback; so far, the TV supports HDMI.
However, streaming services now place regional restrictions on their content, making it inaccessible to users in some locations. To help you bypass the said restriction and assess your favorite streamed content on Chromecast, permit us to show you how to set up NordVPN on your Chromecast device.
Get NordVPN for your Chromecast
Setting Up NordVPN on a Chromecast Device Via a Physical Router
Just like the hardware limitations that prevent SmartTVs from supporting the direct installation of a VPN, Chromecast dongles can only benefit from a VPN service as a third-party installation on a personal computer network. Here is a step-by-step process to set up NordVPN on your Chromecast device via a physical router.
1. Check for VPN service compatibility
If the situation involves a new VPN subscription to cover all devices (Chromecast inclusive) on a local network, it becomes necessary to investigate the compatibility of the VPN in question with your physical router. In the case of NordVPN, a visit to their official website will reveal a list of router designs and brands which support their VPN technology. In other cases, you might want to equally consult with your VPN provider if you’re about procuring a new router. NordVPN became automatically incompatible with some routers that run solely on the L2TP/IPsec and PPTP protocols after the company discontinued its support for the named protocols in 2018.
2. Install NordVPN on your router
Having to install the VPN application on every device connected to the home network can be nerve-wracking. Here are steps to follow to install NordVPN directly to your router:
- Download the router firmware for your VPN
- Connect the new or old router to a PC
- Open the router’s graphical interface on the computer
- Create a strong username and password; don’t settle for the default login details
- Click the Upgrade Firmware tab on the router interface, do this by selecting the earlier downloaded firmware
- Enter activation code supplied after subscription payment, and activate
3. Initiate the Chromecast app
After starting the Chromecast app, the device should automatically detect the available networks within reach.
4. Connect to the VPN-enabled network
Identify your VPN-protected router and connect. If you do not see the router network, ascertain that the router is actively broadcasting.
5. Authenticate
After connecting the Chromecast app, the router will require you to supply the initial setup password. Key in the password and click the ‘Set Network’ button. At this stage, your Chromecast is as free as a bird; you can explore, stream, and cast online content as you wish.
Setting Up NordVPN on a Chromecast Device Via a Virtual Router
There could be situations where NordVPN does not support the protocol of your physical router, or you don’t have an actual router. It is possible to use your Personal Computer as a wireless virtual router; so far, the necessary network features are supported by the device in question.
Wondering how to transform your Mac or Windows computer into a virtual router? Follow these steps
For Windows
1. Confirm the possibility of your Windows PC functioning as a virtual server. You can do this by opening the Windows search bar and typing ‘cmd’; the Command Prompt application should appear at the top of the search result.
2. Right-click on the Command Prompt app, and select ‘Run as administrator.’
3. In the Command Prompt window, key in the following command ‘netsh wlan show drivers.’ Please note that cmd commands are case-sensitive.
4. After hitting return, the command line will respond by displaying texts similar to those in the image below. The ‘Hosted network supported’ option having a ‘Yes’ in front of it indicates that the PC can function as a virtual server.
Now that we have the assurance of your Windows PC’s capability as a virtual router, it’s time to set it up.
Get NordVPN for your Chromecast
Setting Up Your Windows PC as a Virtual Router
Key in the following command in the CMD window: ‘netsh wlan set hostednetwork mode=allow ssid=NETWORKNAME key=PASSWORD.’
The ‘mode’ portion of the command turns on the virtual router capability, ‘ssid’ stands for the name or identity of the network, and ‘key’ is the password. The administrator can set the network name and the password according to preference.
6. After entering the command in the previous step, the Command Prompt app should respond by displaying a message indicating that the hosted network is now allowed. Next, type in ‘netsh wlan start hostednetwork’ and hit the return key. Another message will then appear, indicating that the hosted network is active.
7. Once the hosted network is confirmed as initiated, go to the ‘Network and Sharing Center’ – this can be assessed by right-clicking on the Wi-Fi icon in the bottom right corner of the computer screen. On the dialog box that pops up, click ‘Change adapter settings.’ Then go a little further by right-clicking on the local network you created, and select ‘Properties.’ The private network is identifiable by the NETWORK NAME you saved from step 5. On the ‘Properties’ dialog box:
- Navigate to the ‘Sharing’ tab, tick the box labeled as ‘Allow Other Network User to Connect through this computer’s Internet connection.’
- Then save the new settings by clicking ‘OK’ at the bottom of the ‘Properties’ dialog box.
8. At this point, your virtual server is up and running. Next, you have to initiate the Chromecast app. On the application setup prompts, you’ll at some point be required to connect to a wireless network. You can then connect the Chromecast device to the newly created virtual router, and there, your device can connect via NordVPN!
For Mac
Setting up a Mac as a virtual router is much easier than the Windows counterpart. The following steps make your setup process a walk in the park:
1. Go to the ‘System Preferences’ on the home screen of your MacBook.
2. Then navigate to the ‘Network’ section; here, you add a new network service by clicking on the + sign.
3. In the pop-up window, set the selection boxes thereon following this guide: Interface = VPN, VPN Type = L2TP over IPSec, Service Name = Whatever name you want to appear when other devices see this network. After choosing the prescribed selections, click the ‘Create’ button; this creates your VPN network.
4. Return to the ‘Network’ section and open the just created VPN connection. The pop-up window will require you to enter the server address, account name, and other similar details; enter them as exactly supplied by NordVPN. Remember to check the ‘Show VPN Status’ in the menu bar’ option; it allows you to keep tabs on activities on the network without having to go all the way to ‘System Preferences.’
5. Under the ‘Authentication Settings,’ input the VPN password. Input and save the number in the ‘Shared Secret’ box, but you might want to write it somewhere, just to be safe.
6. Double-check all boxes to check in the ‘Options’ section, then save all changes before proceeding to exit the page.
7. Share the internet connection of your NordVPN-enabled MacBook with the Chromecast device; doing this is quite similar to the steps involved in setting up the wireless hotspot of your smartphone.
Why Should You Use a VPN for Chromecast Devices?
VPN subscribers that happen to use the Chromecast content streaming services tend to favor VPN usage for the following reasons:
1. It helps to circumvent all forms of geographical restriction on streaming services.
2. VPNs encrypt the personal data of Chromecast users and provide as much protection as high-end network devices.
3. Saves costs with a VPN service that supports multiple devices on one subscription. Users will be able to protect their multiple devices using just one subscription package.
Advantages of Using NordVPN on Chromecast Devices
The initial reason why Chromecast users opted for VPN usage was to overcome the bottleneck of geographical censorships peculiar with streaming services. But like many other IoT devices that enjoy the various potentials of internet connectivity, security vulnerabilities are starting to emerge.
Using a reliable VPN service like NordVPN will effectively avert security threats. You will be able to steer clear of hackers and any other cybercriminal lurking around the internet. With your details secure, you can go about your activities without fear of threats of any kind.
Get NordVPN for your Chromecast
Frequently Asked Questions on Setting Up and Using NordVPN on Chromecast
Can NordVPN affect my streaming speed on Chromecast?
Yes, NordVPN can affect your streaming speed on Chromecast positively or negatively. It is highly unlikely that the top VPN service will significantly reduce your streaming speed, but there will be slight speed reductions you may not notice. This is because of two things: encryption and a longer route.
A NordVPN server that encrypts your data will be slower than a server that doesn’t need to encrypt data. In addition, the NordVPN server you connect to is another stop in the route your data takes to reach its destination. Still, NordVPN delivers when it comes to maintaining your speed. Also, NordVPN can increase your streaming speed if your ISP reduces your bandwidth by throttling.
Should I use a free VPN on Chromecast instead of NordVPN?
No, you shouldn’t substitute NordVPN for a free VPN service on Chromecast. No free VPN is a better alternative to NordVPN for Chromecast. First of all, free VPNs have different limitations. For example, many free VPN services only give access to a few servers. In addition, they restrict bandwidth and speed. Furthermore, their servers might lack the sophistication needed to unblock streaming services on Chromecast.
Is it safe to use NordVPN on Chromecast?
Yes, it is safe to use NordVPN on Chromecast. NordVPN has some brilliant security features to protect you from bad actors. It uses 256-bit encryption and perfect forward secrecy to keep your connection secure. It also has additional security features such as Double VPN, Onion over VPN, split tunneling, leak protection, and a kill switch. NordVPN has also invited a security research company to prove its apps are safe to use. So, you can rest assured knowing NordVPN takes your security seriously.
Is it illegal to use NordVPN on Chromecast?
No, it is certainly not illegal to use NordVPN on Chromecast. However, it can depend on where you currently reside. Some countries restrict VPN use; they don’t care what you use it for. As a result, you should always know the laws regarding VPN usage wherever you go.
Conclusion
Chromecast devices do not support a direct installation of VPN applications. However, a way to short-circuit this challenge is to have a reliable service such as NordVPN installed on a router. This guide shows you how to set up NordVPN on both physical and virtual routers. The steps are straight to the point. You will hardly need to be a techie to successfully go through the process.