How to Use VPN on Windows 10
Ever wondered just how secure your internet connection is? You’re not alone. The use of Virtual Private Networks (VPNs) has skyrocketed, with many turning to solutions like ExpressVPN, NordVPN, and Surfshark for added security. I’m here to guide you on how to seamlessly set up and use a VPN on Windows 10.
As someone who’s been in the digital space for years, I’ve seen firsthand the importance of privacy and security online. It’s vital that we understand not only why a VPN is necessary, but also how to properly implement it into our daily browsing habits. By using one of these trusted VPNs, you’re effectively encrypting your data and masking your IP address – think James Bond level of stealth!
Now, let’s dive into the meaty part: setting up a VPN on Windows 10. This may sound like an intimidating task, especially if you’re not tech-savvy. But don’t worry! Whether you’re planning to use ExpressVPN, NordVPN or Surfshark (or any other reliable VPN service), I’ll break down the process step by step, so it’ll be as easy as pie. Buckle up because we’re about to embark on a journey towards safer internet browsing!
ExpressVPN

Overall score: 9.8
- 3,200 servers across 105 countries
- Works with streaming platforms
- AES 256-bit encryption
- Supports private protocol, Lightway
- Money-back guarantee
30-day money-back guarantee
NordVPN


Overall score: 9.6
- 8,700+ servers available in 129 countries
- Connect up to 10 devices simultaneously
- Great security features
- Verified no-logs policy
- Unblocks streaming platforms
30-day money-back guarantee
Surfshark
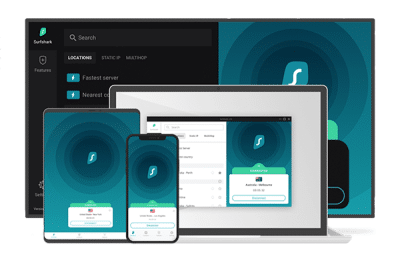
Overall score: 9.5
- 4,500+ servers in 100+ countries
- Allows unlimited simultaneous connections
- Integrates stealth mode
- Multihop feature available
- Webcam protection from unauthorized apps
30-day money-back guarantee
Proton VPN

Overall score: 9.4
- 17,250+ servers in 125 countries
- Free version available
- Strong security features
- Reliable no-logs policy
- Allows Perfect Forward Secrecy
30-Day Money-Back Guarantee
CyberGhost

Overall score: 9
- 9,300+ reliable servers in 100 countries
- 45-day money-back guarantee
- Strict no-log policy
- Tough security features
45-Day Money-Back Guarantee
Understanding the Basics of a VPN
Let’s dive right into the world of Virtual Private Networks, commonly known as VPNs. It’s a technology that encrypts your internet connection and protects your online identity. This layer of security is incredibly important in today’s digital age, where cyber threats lurk around every corner.
A critical aspect to understand about VPNS is the role they play in enhancing online privacy. Surfing the web without a VPN can expose you to hackers and surveillance entities, compromising your data. Using services like ExpressVPN, NordVPN, or Surfshark adds an extra layer of protection by masking your IP address, making it tougher for anyone to track your online activities.
Here’s how it works: Once you connect to a VPN server, all your internet traffic gets redirected through that server, located anywhere across the globe. Your real IP address gets replaced with one from this server, making it seem like you’re browsing from its location.
This not only enhances privacy but also allows access to region-restricted content. For example:
- If there’s streaming content available only in Germany, and you’re based out of the U.S., just connect via a German VPN server.
- If certain websites or services are blocked in your region, using a VPN can bypass these restrictions conveniently.
When choosing between different services such as ExpressVPN, NordVPN, or Surfshark; consider factors such as speed, number of servers and countries covered, pricing plans and security features offered.
On Windows 10 specifically:
- Look for apps compatible with the OS.
- Check if they offer a kill switch feature – this automatically disconnects you from the internet should the VPN connection drop unexpectedly.
- See if they provide customer support dedicated for Windows users.
Remember, though – while using a VPN increases security significantly, it doesn’t make you entirely anonymous or immune to all threats online! Stay cautious and surf safe!
Step-by-Step Guide: Setting Up a VPN on Windows 10
Let’s dive right into the process of setting up a VPN on your Windows 10. I’ll be focusing on three popular options: ExpressVPN, NordVPN, and Surfshark.
First things first, you’ll need to make a decision about which VPN service you want to go ahead with. Each has its own strengths. ExpressVPN offers high speed and robust security, NordVPN excels in privacy features, while Surfshark is known for its budget-friendly price point.
- Purchase and download your chosen VPN software: After selecting the service that suits your needs best, it’s time to head over to their website. Purchase a plan that aligns with your requirements – there are usually monthly or yearly options available.
- Installation: Once purchased, you can download the software directly from the site onto your Windows 10 system. The installation process is typically straightforward – just follow the prompts provided by the installer.
- Setup and Configuration: After successfully installing your chosen VPN (be it ExpressVPN, NordVPN or Surfshark), launch the application. You’ll then need to log in with your account details created during purchase.
- Connect to a server: Now comes an exciting part! All these services offer multiple servers worldwide; hence you have an ocean of choices when it comes to picking a server location. Remember that choosing a server closer to your actual location can often yield better performance.
- Enjoy secure browsing: That’s all there is! Your connection should now route through the selected server, meaning you’re using the internet under cover of encryption provided by these top-notch VPNs!
Also important, is knowing how to disconnect when needed – simply open up the program again and hit ‘disconnect’ or ‘stop’.
Setting up any of these three great choices – ExpressVPN, NordVPN or Surfshark – isn’t as daunting as it may seem initially! With this step-by-step guide in hand, even beginners will breeze through setup like pros.
Troubleshooting Common VPN Issues on Windows 10
Sometimes, even the most reliable VPNs can run into issues. But don’t worry! I’m here to help you troubleshoot some common problems you might encounter while using ExpressVPN, NordVPN, or Surfshark on your Windows 10 system.
Firstly, let’s talk about connectivity. If you’re having trouble connecting to a server, it’s likely that there might be a temporary issue with the specific VPN server you’re trying to reach. Don’t fret! Just try switching to another server location. This solution works like magic most of the time.
Now, suppose your internet connection slows down drastically when connected via VPN? It’s not an uncommon issue and often relates to your ISP throttling bandwidth for VPN connections. Here are a few tips:
- Try changing your protocol settings.
- Use an Ethernet cable instead of Wi-Fi.
- Change your DNS settings.
Remember this: slower speed doesn’t always mean there’s something wrong with the VPN itself!
Next up is software conflict. Your antivirus or firewall may sometimes interfere with your favorite VPN – whether it’s ExpressVPN, NordVPN, or Surfshark. To resolve this, add these apps as exceptions in your antivirus and firewall settings.
If none of these solutions work, it could be time for the classic IT move – uninstalling and reinstalling the app. Ensure that you have all necessary credentials before starting this process because they’ll come in handy during reinstallation.
Lastly, but surely not least important, if all else fails and you’re still encountering problems with these services on Windows 10 – get in touch with their customer support teams! They’ve got experts who deal specifically with technical troubles like these every day.
And remember – patience is key when troubleshooting tech issues! You’ll get through this one too!
Conclusion: Maximizing Your VPN Experience
Now that we’ve walked through the steps of setting up a VPN on Windows 10, let’s talk about maximizing your experience. It’s not just about having a VPN installed – it’s also crucial to ensure you’re using it effectively and safely.
First off, the choice of your VPN provider matters greatly. I can vouch for well-established providers like ExpressVPN, NordVPN, and Surfshark. They all come with robust security protocols and have proven their reliability over time.
- ExpressVPN has a reputation for its high-speed servers and user-friendly interface.
- NordVPN stands out with its advanced security features and large number of server locations.
- SurfShark, while relatively new, offers unlimited simultaneous connections and competitive pricing.
Secondly, always remember to connect to your VPN before surfing the web. This might seem obvious but trust me; it’s easy to forget when you’re in a rush or multitasking.
Thirdly, get into the habit of checking your IP address regularly. This is an effective way to ensure that your VPN is working correctly.
Finally, make sure you’re keeping your VPN app updated at all times. Updates are usually meant to fix bugs and enhance security features – two things critical for safe browsing.
To sum it up:
- Choose a reliable provider (like ExpressVPN, NordVPN or Surfshark)
- Always connect before browsing
- Regularly check your IP address
- Keep your app updated
By following these tips, I assure you’ll be maximizing your VPN experience on Windows 10! Remember – staying safe online isn’t hard; it just requires some knowledge and consistency. Happy secure surfing!