How to Set Up and Use ExpressVPN on Synology (2024 Guide)
Synology’s service in the Network-Attached Storage (NAS) industry has gone beyond two decades. The DiskStation, its most popular device, provides file-storage and file-sharing capabilities. Using a VPN on Synology ensures that you can access or transfer files over a network without having to worry about unwanted data exposure. There is no better choice than ExpressVPN to handle your online security. This article dives into the setup process for ExpressVPN on Synology.
Setting Up ExpressVPN on Synology
There are two ways you can set up ExpressVPN on your Synology device.
1. You can set it up using OpenVPN. This requires configuring a manual OpenVPN connection and is usually the preferred method because of its security, speed, and reliability.
2. You can set it up using L2TP/IPSec. This requires configuring a manual L2TP/IPSec connection. It is a good option if your device does not support OpenVPN.
Setting Up ExpressVPN Using OpenVPN
The OpenVPN protocol is one of the safest and fastest VPN protocols. The fact that it is open source is one of the reasons why it is secure. Setting up ExpressVPN on Synology using OpenVPN is somewhat technical. However, you should have no issues if you follow the instructions in this guide. Let’s take a look at the process below.
1. Head over to the ExpressVPN setup page. Enter your ExpressVPN credentials to sign in if you have not previously signed in. Click on the “Get ExpressVPN” button and purchase a subscription plan if you don’t have an account.
2. Once you have access to your ExpressVPN account, head over to your dashboard and select the “Set Up Other Devices” tab. Click on “Manual Configuration.”
3. Click on the “OpenVPN” button. Under it, you will see your unique service credentials (username and password). Below your credentials, there is a list of OpenVPN configuration files based on the location of servers. Select the server location you intend to connect to and download the OpenVPN configuration file (.ovpn) of that server. Leave the browser page open because you will need it later.
4. Next, you need to sign in to your Synology NAS control panel. Once you have access, select “Control Panel” on the desktop.
5. Under the “Connectivity segment, select “Network.”
6. You need to disable IPv6 to avoid IPv6 leaks. Select “Network Interface,” click on “LAN,” and click the “Edit” button.
7. Select the “IPv6” segment in the “Edit” menu, enter the following detail:
IPv6 setup: Off
Click “OK”. This successfully turns off IPv6. Your Synology device will not generate nor receive any IPv6 traffic.
8. Reboot your Synology device.
9. Next, you need to set up a new VPN profile. Go back to the “Network Interfaces” menu and select the “Create” button. Click “Create VPN profile” on the dropdown menu.
10. A new “Create Profile” window will pop up. Choose “OpenVPN (via importing a .ovpn file” as the VPN connection method and select the “Next” button.
11. Input the following details under “General Settings” and click on the “Next” button:
Profile name: Input a name that will describe your VPN connection. We recommend using the name of the server or server location so it will be easier to recognize the connection.
User name: Enter the ExpressVPN service username you saw in step 3 above.
Password: Enter the ExpressVPN service password you saw in step 3 above.
Import .ovpn file: Import the OpenVPN configuration file of the server you intend to use (look at step 3 above).
CA certificate: Leave this empty.
11. Under “Advanced Settings,” tick the box beside “Use default gateway on remote network” and “Reconnect when the VPN connection is lost.” You can either tick the box for “Allow other network devices to connect through this Synology server’s Internet connection” or leave it as it is, depending on your preference. Then click “Apply” to finish creating the ExpressVPN profile.
12. You should see your newly created ExpressVPN profile under the “Network Interface” section. Click on it and select the “Connect” button.
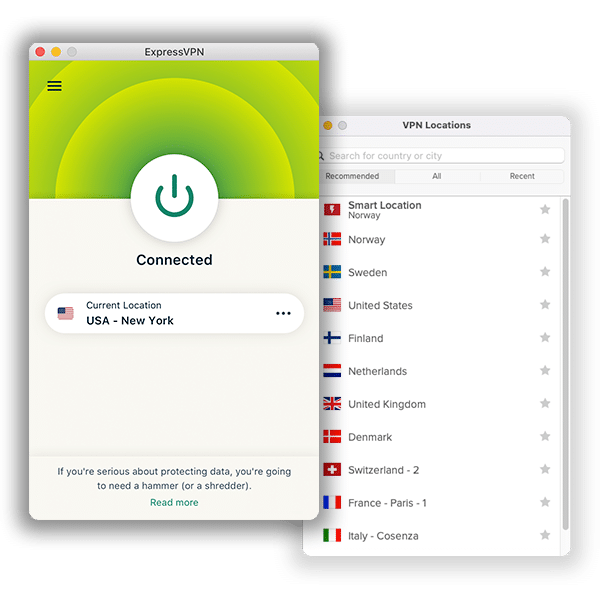
13. As confirmation that the VPN is working, you should see “Connected” below the ExpressVPN connection profile.
14. To disconnect the connection, click on the VPN profile, and select the “Disconnect” button.
You should have no issues following these 15 steps to configure ExpressVPN on your Synology NAS device. In any case that you do, reach out to ExpressVPN’s support team.
Setting Up ExpressVPN Using L2TP/IPSec
L2TP/IPSec is another secure VPN protocol that you can use if your device does not support OpenVPN. Like the OpenVPN configuration setup, it is also a technical process. Let’s take a look at how to set up ExpressVPN on Synology using L2TP/IPSec.
1. Head over to the ExpressVPN setup page. Enter your ExpressVPN credentials to sign in if you have not previously signed in. Click on the “Get ExpressVPN” button and purchase a subscription plan if you don’t have an account.
2. Once you have access to your ExpressVPN account, head over to your dashboard and select the “Set Up Other Devices” tab. Click on “Manual Configuration.”
3. Click on the “PPTP & L2TP/IPsec” button. Under it, you will see your unique service credentials (username and password). Below your credentials, there is a list of servers based on their location. Select the server location you intend to connect to and note the hostname of the server. Leave the browser page open because you will need it later.
4. Next, you need to sign in to your Synology NAS control panel. Once you have access, select “Control Panel” on the desktop.
5. Under the “Connectivity segment, select “Network.”
6. You need to disable IPv6 to avoid IPv6 leaks. Select “Network Interface,” click on “LAN,” and click the “Edit” button.
7. Select the “IPv6” segment in the “Edit” menu, enter the following detail:
IPv6 setup: Off
Click “OK”. This successfully turns off IPv6. Your Synology device will not generate nor receive any IPv6 traffic.
8. Reboot your Synology device.
9. Next, you need to set up a new VPN profile. Go back to the “Network Interfaces” menu and select the “Create” button. Click “Create VPN profile” on the dropdown menu.
10. A new “Create Profile” window will pop up. Choose “L2TP/IPSec” as the VPN connection method and select the “Next” button.
11. Input the following details under “General Settings” and click on the “Next” button:
Profile name: Input a name that will describe your VPN connection. We recommend using the name of the server or server location so it will be easier to recognize the connection.
Server address: Enter the server address (hostname) of the server you intend to use (check step 3 above).
User name: Enter the ExpressVPN service username you saw in step 3 above.
Password: Enter the ExpressVPN service password you saw in step 3 above.
Pre-shared key: Input 12345678
12. Under “Advanced Settings,” select the following options and click the “Apply” button:
Authentication: MS CHAP v2
Use default gateway on remote network: Tick this box
Allow other network devices to connect through this Synology server’s Internet connection: You can either tick this box or not, depending on your preference.
Server is behind NAT device: Tick this box.
Reconnect When the VPN connection is lost: Tick this box
13. You should see your newly created ExpressVPN profile under the “Network Interface” section. Click on it and select the “Connect” button.
14. As confirmation that the VPN is working, you should see “Connected” below the ExpressVPN connection profile.
15. To disconnect the connection, click on the VPN profile, and select the “Disconnect” button.
You can see that the process is somewhat similar to configuring OpenVPN with a few differences.
Advantages of Using ExpressVPN on Synology
The benefits of using ExpressVPN on Synology include the following:
1. Impermeable Security Layer
ExpressVPN is one of the most highly rated VPN service providers. It is no wonder that its basic and advanced security features form a security layer that malicious entities cannot penetrate. It utilizes the most secure encryption protocol (AES-256) and reliable VPN protocols to create a solid defensive wall against unwanted access. Other features that contribute to this defense include a Kill Switch, Split Tunneling, Leak protection, and compatibility with Tor.
2. Anonymity and Privacy
ExpressVPN’s extensive server network allows you to choose from a long list of servers to successfully mask your IP address, giving you the needed anonymity. Your data is also safe as it does not store data and uses TrustedServer Technology to ensure all its servers run on volatile memory only.
3. Dependable Customer Support
An unreliable customer support team can negatively influence the use of a VPN. ExpressVPN’s customer support team is dependable and always available. You can reach out to them at any time of the day and be sure to get a response within a few minutes. Its support center is full of helpful resources that can help you overcome any issues you have.
Frequently Asked Questions on Using ExpressVPN on Synology
Here are some frequently asked questions.
If you’re a Synology user for both business and personal use, then you’ve likely come across the debate on whether VPNs are necessary to keep your data secure. While some people think that the added security measures are unnecessary, the fact is that VPNs are perfect when it comes to keeping your internet traffic and encrypting NAS files. There’s the risk of getting your files hacked by cybercriminals when using Synology.
A VPN will encrypt your network, change your IP address and grant you absolute anonymity. Whether you’re using a private or public network, you’ll be safe from cyberattacks.
By default, the Synology router receives its external IP address from your ISP. It can be problematic if you want to use the NAS outside your home or if you want to connect to it remotely from another country. With a VPN, you can instead assign any external IP address to hide your real location. It is a much smarter option for travelers.
The privacy and security features of ExpressVPN make it great for Synology. The VPN provider uses military-grade encryption, has key protocols, has a kill switch, malware protector, and other features to guarantee your online safety. It also has a strict zero-log policy to ensure your privacy. With ExpressVPN, you can be sure of your privacy, anonymity, and security whenever you’re using Synology.
Moreover, it has a 30-day money-back guarantee offer. If you’re unsatisfied with the service, you can request a refund of your subscription.
No, it is not recommended. The whole point of using a VPN is to ensure your online safety and privacy while sending files on Synology. A free VPN cannot provide the needed security. Since the service is free, it doesn’t have those security and privacy features. Moreover, some VPNs are known to spread malware through excessive ads. It is best to use ExpressVON for Synology.
Conclusion
Using ExpressVPN on Synology reduces the risk of malicious entities penetrating your network and stealing or destroying vital data. Configuring it can be complicated for the non-technical user, which is why we have broken it down into easy-to-follow steps. Surely, this guide will help you set up ExpressVPN on Synology.