How to Setup and Use NordVPN on Apple TV (2026 Guide)
Apple TV is one of the favorite options when it comes to streaming devices. With it, you can watch great content around the world. This great streaming platform and its devices can offer maximum entertainment when paired with the ideal VPN. You might be wondering why you would need a VPN in the first place.
Like many other streaming platforms, Apple TV works with geo-restrictions. This means that you can only access content that is unique to your location. With a VPN, you can beat such geo-restrictions and access content from anywhere around the world. A VPN such as NordVPN helps you achieve all these.
The only downside to this is that there is no dedicated NordVPN software for Apple TV. However, there are other methods through which you can set up and use NordVPN on Apple TV. In this article, we will give a step-by-step guide on how to set up NordVPN on Apple TV using each of these methods starting from the easiest. If you’re looking for alternative options, take a look at our guide on how to set up NordVPN on Chromecast.
Get NordVPN for your Apple TV
How To Set Up NordVPN on Apple TV via a Computer (Using WiFi)
This is the easiest method ever. All you need is your computer, your active NordVPN subscription, and your Apple TV device. This method works on both Windows and macOS. Below are the steps to follow:
1. Install NordVPN software on your computer.
2. Log in and connect to a suitable server. Then set up a WiFi hotspot on your computer.
3. Connect your Apple TV to that WiFi hotspot
4. You are good to go.
How To Set Up NordVPN on Apple TV via a Computer (Using Ethernet)
This method is easy too. All you would need is your computer, a NordVPN subscription, and an Ethernet cable. There is a setup for Windows and another for macOS. We will touch on both setups:
For Windows
1. Install NordVPN.
2. Connect to a suitable server.
3. Connect your computer to your Apple TV device using an Ethernet cable.
4. Go to Control Panel>Network and Sharing Center.
5. Click on Change Adapter Settings.
6. Go to connection properties. Click on Allow Other Network Users to Connect through This Computer’s Connection
7. Turn on your Apple TV and test the connection. It should be working fine.
For macOS
1. Install NordVPN.
2. Connect to a suitable server.
3. Connect your computer to your Apple TV device using an Ethernet cable.
4. Go to System Preference>Sharing Option.
5. Go to Internet Sharing. Under the Share Your Connection From option, choose Airport mode.
6. Go to Computer Using and choose Ethernet.
7. Turn on your Apple TV and test the connection. It should work fine now.
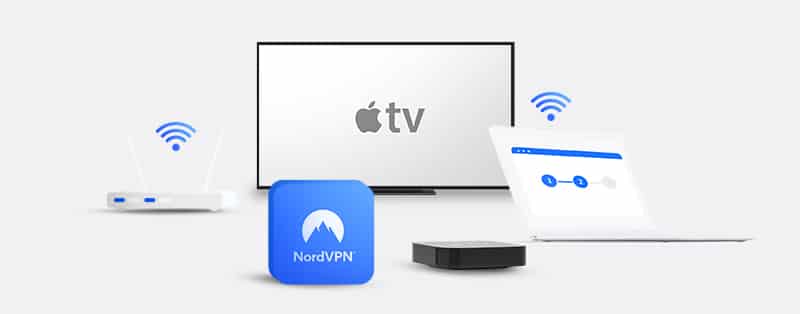
How to Set Up NordVPN on Apple TV Via a Router
Setting up with a router would be really easy if you got a Pre-configured Router. A Pre-configured Router comes with a VPN already installed in it. You do not have to do any configuration. All you need to do is turn on your router and connect to your device.
The downside of a pre-configured router is that it is rather pricey. The only other option for a Pre-configured Router is an unconfigured Router. The downside here is obvious. You have to do all the configuration yourself. While this may not be easy, it is possible. Whatever unconfigured Router you would use must:
- Be compatible with VPNs
- Support OpenVPN
- Support NordVPN as a client, not as a server
To Set up NordVPN on Apple TV using a router, you must follow the steps given below. Do not touch anything that you aren’t instructed to modify. This can jeopardize the entire set up.
Get NordVPN for your Apple TV
Step one: Download OpenVPN Configuration Files from NordVPN
- Open your router settings panel by entering 192.168.1.1 or 192.168.0.1. in your browser.
- Click Services and open the VPN minitab.
- Click on Start OpenVPN Client.
- Now, you should be able to access the OpenVPN Configurations Panel.
Step 2: Fill in the Following OpenVPN Client Custom Settings
- Server IP/Name: Input the Server IP or Name of the OpenVPN file from any of the ones available here: Server recommended by NordVPN.) Click on Show Available Protocols. Download the UDP or TCP configuration file available on the list. It is usually found under the server tile.
- Port Address: 1194 (or 443 for TCP protocol)
- Tunnel Device: Select the TUN option.
- Tunnel Protocol: UDP or TCP.
- Encryption Cipher: AES-256-CBC
- Hash Algorithm: SHA-512.
- Username and Password = Enter Your NordVPN Username and associated password.
- Advanced Options: Enabled.
- TLS Cipher: None
- LZO Compression: Disable
- NAT: Enable
- Firewall Protection: Enable.
- IP Address: leave blank.
- Subnet Mask: leave blank.
- Tunnel MTU setting: 1500.
- UDP Fragment: 1450.
- Tunnel UDP MSS-Fix: Enable.
- nsCertType verification: Tick ✔
Step three: Connect your Apple TV
- Connect your Apple TV to your wireless Router
- Turn on your Apple TV
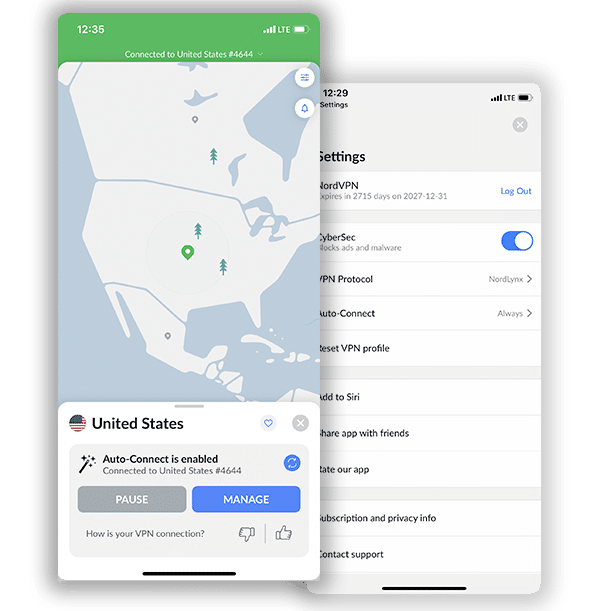
- Go to Settings >General > Network > Configure WiFi
- Select your WiFi, enter the password. Click connect, and you are good to go.
Remember to stick to this guideline to the latter, as any change could significantly affect the whole process.
How to Set Up NordVPN on Apple TV Via DNS
Another option you can use is the SmartDNS option. With the SmartDNS option, you can configure your Apple TV to bypass geo-restrictions without a VPN. This means you can stream with breakneck speed, as a VPN can sometimes slow down the speed. The only downside to this (which is huge) is that you remain unprotected since you do not use a VPN. Below is the process for configuring the DNS. It involves three significant steps.
Step 1
This involves creating a DDNS Hostname:
- You have to select a third-party DNS Hostname provider. We recommend using Dynu.
- Go to the Dynu site and click create an account on the top-right corner of the screen. Fill in all necessary information and submit. (Ensure you give a valid Email address as you would need it to verify your account.
- When you submit, a message will display on the screen informing you that a verification mail has been sent to your Email address. Go to your Mail and click on the verification mail link to verify your new Dynu account.
- Log into your newly created Dynu account and click DDNS services.
- Click Add on the top-right corner
- The next step has two options. You can either use a Dynu domain name (which is much easier), or you can use your existing domain name if you have one. But choices will work fine no matter what you choose. Choose whatever option you prefer and click Add.
- Next, uncheck “Wildcard Alias” and enable the IPv6 address. Click Save. Your Dynu account is set.
Step 2
- Purchase a NordVPN subscription.
- Log into the website dashboard and open DNS Settings.
- Click Dynamic DNS Registration.
- Input your Dynu hostname and add Dynu.com at the end of it.
- Select Save Hostname. An “Updated” notification will appear.
- Hold on for up to 15 minutes to allow NordVPN to detect IP change.
Step 3
Configure DNS on your Apple TV
- Turn on your Apple TV
- Go to Settings > Network >WiFi
- Click on your Network
- Then Click on configure DNS
- Click Manual
- Enter the IP address you got
- Click Done and restart your Apple TV
Remember, the DNS does not offer any protection whatsoever. You are vulnerable. If you want to get protection, use a VPN. Any of the methods listed above would suffice.
Why Should a NordVPN Apple TV Setup Benefit You?
NordVPN is a top-tier VPN and offers a lot of merits. Below are the advantages of using a NordVPN Apple TV combination.
1. Server Coverage
NordVPN has one of the broadest server coverages among VPNs. It offers over 5400 servers in 59 countries. You can connect to different locations from the comfort of your home. Their connections are stable and robust.
2. Unblocking prowess
NordVPN offers unblocking prowess that is almost unrivaled. You can unblock content from all around the world on your Apple TV. You can access content on Netflix, Spotify, and iTunes on your Apple TV. With NordVPN, there are no geo-restrictions that could keep you from getting the entertainment you duly deserve.
3. Security and Privacy
Using NordVPN on your Apple TV not only offers you access and entertainment but security also. Nord VPN provides the best protection and privacy for your devices. You can browse the net in safety and stream anything you want to stream.
It uses AES 256-bit along with a kill switch to ensure that your data is inaccessible. Not even the government or the best cyber hackers can get to you now. It also offers a no-log policy, ensuring that no record of users’ data is kept. This is the height of safety and security.
Get NordVPN for your Apple TV
Frequently Asked Questions on Using NordVPN on Apple TV
Here are some frequently asked questions.
Yes, you can use NordVPN and Apple TV. The provider is an elite brand that offers online privacy and security services and grants access to geo-restricted sites. It has a network of 5,100+ servers in over 59 countries. It can stream content without hassle even though the restricted channels are locked.
Moreover, NordVPN has recently implemented built-in features to improve security and streaming. It uses military-grade AES 256-bit encryption, secure protocols, and has features like a kill-switch, and malware protector to provide an extra layer of protection. It offers fast server speed and has a strict no-logs policy to guarantee your privacy.
You can set up NordVPN to work with your Apple TV. First, set the VPN service on your home router. When you set up NordVPN, open the app and go to Settings to specify which devices you’d like to use the service on. After finishing the router setup, you can connect your Apple TV to it. NordVPN will ensure that your device is protected by the VPN service, while also keeping your browsing location and activity hidden from anyone trying to track you.
No, Apple TV is not accessible in any other country, except the U.S. You won’t be able to watch any U.S content outside the U.S. However, through a reliable VPN like NordVPN, you can access it from anywhere.
You can use your Apple TV to connect with a free VPN server. However, it is advisable to avoid using the free service as it does not provide the same level of security as a VPN like NordVPN, so you will still be at risk of cyberattacks when using one. You also can’t guarantee your access to AppleTV with a free VPN. They carry the risk of being blocked by AppleTV. Free VPNs can’t provide the quality features NordVPN offers. We recommend you use NordVPN.
Conclusion
Using NordVPN on your Apple TV is possible. All you have to do is follow the guidelines given for whatever method you choose to use. If you follow the guidelines correctly, you would be enjoying the merits of NordVPN on your Apple TV in no time. Happy streaming.