How to Install NordVPN on Samsung Smart TV (2026 Step-By-Step Guide for Every Method)
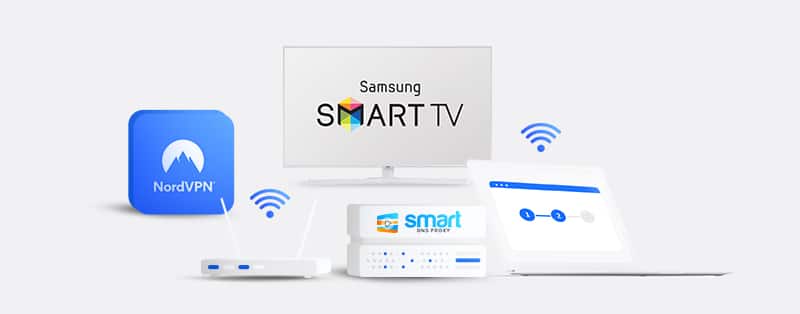
If you’re looking to enjoy secure streaming and browsing on your Samsung Smart TV, installing NordVPN is a great solution. With NordVPN on your Samsung TV, you can easily access geo-restricted content and protect your privacy while watching your favorite shows and movies. In this guide, we will walk you through the different methods for setting up NordVPN on your Samsung Smart TV, ensuring a smooth and hassle-free experience. Whether you’re using the app directly, configuring SmartDNS, or connecting through a router, NordVPN offers a variety of ways to enhance your streaming experience on a Samsung TV.
NordVPN is generally available to users on various devices, including Android, iPhone, Mac, Windows, Android TV, etc. Samsung Smart TVs are compatible with NordVPN, though they require specific setup methods due to the Tizen OS.
There are four primary ways to set up NordVPN on Samsung Smart TV.
- Download NordVPN App for Android
- Use NordVPN’s SmartDNS Feature
- Download the NordVPN App for Amazon Fire Devices
- Set up NordVPN on your router
Nevertheless, this article will guide you through the process of using any of these methods and every other thing useful you need to know about installing NordVPN on a Samsung Smart TV.
Method 1: Download NordVPN App for Android on Samsung TV
To install NordVPN on Samsung TV, you can utilize the Google Play Store if your device supports Android TV OS. This approach is straightforward and ideal for Samsung Smart TVs running Android, allowing you to enjoy secure streaming and browsing.
Here’s a step-by-step guide to help you set up NordVPN on your Samsung TV using the Android app:
- Check Compatibility
Make sure your Samsung Smart TV supports Android TV OS. This can typically be checked in the settings menu.
- Access Google Play Store
-Open the Google Play Store on your TV.
-Search for the NordVPN app. - Download and Install
-Select the NordVPN app and click Install.
-Wait for the installation to complete - Open and Log In
-Launch the NordVPN app from your home screen.
-Log in with your NordVPN account credentials or sign up if needed. - Connect to a Server
-Choose a server from the list and click Connect.
-Ensure the VPN connection is active.
Using the NordVPN app directly on your Android-based Samsung Smart TV simplifies the process, providing a user-friendly interface and easy access to secure browsing and streaming. This method ensures your NordVPN Samsung TV setup is seamless and effective for maintaining privacy and accessing restricted content.
If you want to enjoy seamless streaming with NordVPN on your Samsung Smart TV, it’s crucial to ensure that the app runs smoothly on your device. The NordVPN Samsung TV app allows you to bypass geo-blocked content with ease, and it integrates perfectly with Android TV OS, ensuring a secure connection for your streaming activities.”
Method 2: Use NordVPN’s SmartDNS Feature on Samsung TV
For Samsung Smart TVs that don’t support Android OS, NordVPN’s SmartDNS feature is a great alternative to access geo-restricted content. This method is simpler and quicker than setting up NordVPN on your router. SmartDNS helps you access geo-restricted content but does not provide encryption, making it less secure than a VPN.
Here’s how to set up NordVPN’s SmartDNS on your Samsung TV:
- Activate SmartDNS in NordVPN Account:
- Disconnect from any VPN services on your devices.
- Log in to your NordVPN account on the NordVPN website.
- Navigate to Services > NordVPN > SmartDNS and click Enable.
- Click Activate SmartDNS and wait a few minutes for activation. Your IP address will be whitelisted, allowing SmartDNS use on your WiFi network.
- Configure DNS on Samsung TV:
- Ensure your Samsung Smart TV is connected to the same network as your device.
- Press the Menu button on your Samsung TV remote and navigate to Network > Network Status.
- Wait for the TV to check the internet connection, then select IP Settings.
- Go to DNS Setting and choose Enter Manually.
- Input the NordVPN SmartDNS server addresses:
- Primary DNS: 103.86.96.100
- Secondary DNS: 103.86.99.100
- Select OK to confirm and allow the TV to check the internet connection again.
- Verify Connection:
- If the DNS addresses are entered correctly, you will see a message confirming the internet connection.
- Click Close to finish the setup process.
After confirming the VPN connection, you can now enjoy safe browsing and access content from anywhere on your Samsung Smart TV. The NordVPN Samsung TV setup ensures that all your online activities are encrypted, offering the highest level of privacy and security while streaming or browsing.
Method 3: Use NordVPN on Amazon Fire Stick or Fire TV on Samsung TV
Utilizing NordVPN on Samsung TV through Amazon Fire devices enables you to share a VPN connection, ensuring secure browsing and streaming on your Samsung Smart TV. Here’s a streamlined guide to setting up the NordVPN app on Amazon Fire Stick or Fire TV:
- Prepare Your Amazon Fire Device:
- Ensure your Amazon Fire Stick or Fire TV is plugged into your Samsung Smart TV and connected to the internet.
- Ensure your Amazon Fire Stick or Fire TV is plugged into your Samsung Smart TV and connected to the internet.
- Access the Amazon App Store:
- Navigate to the Home screen on your Fire device.
- Select the Search icon and type in NordVPN.
- Download and Install NordVPN:
- Find the NordVPN app in the search results and select it.
- Click Download (or Get) to install the app on your device.
- Open and Log In to NordVPN:
- Once installed, open the NordVPN app.
- Log in with your NordVPN credentials or sign up if you don’t have an account.
- Connect to a VPN Server:
- Choose a preferred server location from the list within the app.
- Click Connect to establish a VPN connection.
- Verify the Connection:
- To ensure your Amazon Fire device is connected to the VPN, check the connection status within the NordVPN app.
- You can also access a geo-restricted app or service on your Samsung Smart TV to confirm the VPN is working.
Using an Amazon Fire device with NordVPN offers a versatile solution for securing your Samsung Smart TV, making it easy to access a wide range of international content. This NordVPN Samsung TV method is particularly useful for users seeking both convenience and enhanced privacy for their streaming activities.
Method 4: Set Up NordVPN on Samsung Smart TV via Router
Configuring NordVPN on Samsung TV via your router offers a seamless method to secure your device, extending VPN protection to all connected devices on your network. Follow these steps to configure NordVPN on your router:
- Check Router Compatibility:
- Ensure your router is compatible with NordVPN. You can find a list of supported routers on the NordVPN website.
- Ensure your router is compatible with NordVPN. You can find a list of supported routers on the NordVPN website.
- Log In to Your Router:
- Open a web browser and enter your router’s IP address (commonly 192.168.1.1 or 192.168.0.1).
- Log in using your router’s username and password.
- Configure VPN Settings:
- Navigate to the VPN section in your router’s settings menu.
- Select OpenVPN as the VPN type (check your router’s manual if you’re unsure).
- Download NordVPN Configuration Files:
- Log in to your NordVPN account on the NordVPN website.
- Go to Downloads > OpenVPN Configuration Files and download the files for your preferred server locations.
- Input OpenVPN Client Custom Settings:
- Server IP/Name: Input the Server IP or Name from the downloaded .ovpn file.
- Port Address: 1194 (or 443 for TCP protocol).
- Tunnel Device: Select TUN.
- Tunnel Protocol: Choose UDP or TCP.
- Encryption Cipher: AES-256-CBC.
- Hash Algorithm: SHA-512.
- Username and Password: Enter your NordVPN credentials.
- Advanced Options: Enable.
- TLS Cipher: None.
- LZO Compression: Disable.
- NAT: Enable.
- Firewall Protection: Enable.
- IP Address: Leave blank.
- Subnet Mask: Leave blank.
- Tunnel MTU Setting: 1500.
- UDP Fragment: 1450.
- Tunnel UDP MSS-Fix: Enable.
- nsCertType Verification: Tick ✔.
- Save and Connect:
- Save the settings and click Connect to establish the VPN connection.
- Save the settings and click Connect to establish the VPN connection.
- Connect Samsung TV to Router:
- Ensure your Samsung Smart TV is connected to the router via WiFi or Ethernet.
- Check the network status on your TV to confirm it is connected to the VPN-enabled router.
Once your Samsung Smart TV is connected to the router with NordVPN, the VPN will automatically protect all connected devices. This method offers a stable and fast connection, ensuring that your TV’s streaming quality remains unaffected while browsing securely.
Note: If your router is not compatible with VPNs, consider purchasing a pre-configured router from NordVPN’s partner, FlashRouters. NordVPN simplifies the setup process by providing comprehensive tutorials with step-by-step instructions and screenshots for a wide range of routers.
Sharing a NordVPN Connection Over Ethernet or WiFi
For Samsung Smart TVs that lack direct VPN installation support, sharing NordVPN on Samsung TV from your computer through Ethernet or WiFi serves as a practical alternative to maintain secure streaming. Here’s a concise guide to both methods:
Sharing NordVPN Connection Over Ethernet
- Prepare Your Devices:
- Ensure your computer is connected to NordVPN and has an active internet connection.
- Connect your Samsung Smart TV to your computer using an Ethernet cable.
- Configure Network Sharing on Windows:
- Go to Control Panel > Network and Sharing Center > Change adapter settings.
- Right-click on the NordVPN network connection and select Properties.
- Navigate to the Sharing tab and check Allow other network users to connect through this computer’s Internet connection.
- From the dropdown menu, select the Ethernet connection you’ve connected to your Samsung TV.
- Configure Network Sharing on macOS:
- Go to System Preferences > Sharing.
- Select Internet Sharing from the left menu.
- Share your connection from NordVPN (usually displayed as your WiFi or Ethernet connection).
- To computers using Ethernet, check the corresponding box.
- Click Start to enable sharing.
- Verify Connection on Samsung TV:
- Go to Settings > Network > Network Status on your TV.
- Ensure the TV is connected to the internet through the Ethernet connection.
Confirm that the connection has been successfully established by navigating to the network settings on your Samsung Smart TV. Once connected, NordVPN Samsung TV ensures you can stream your favorite content safely, providing access to global libraries and keeping your browsing activities protected from third-party trackers.
Sharing NordVPN Connection Over WiFi
- Prepare Your Devices:
- Ensure your computer is connected to NordVPN and has an active internet connection.
- Ensure your computer is connected to NordVPN and has an active internet connection.
- Configure Hotspot on Windows:
- Go to Settings > Network & Internet > Mobile hotspot.
- Toggle Mobile hotspot to On.
- Under Share my Internet connection from, select NordVPN connection.
- Configure the Network name and Password, then click Edit.
- Click Adapter options, right-click on the NordVPN connection, select Properties, and enable Internet Connection Sharing.
- Configure Hotspot on macOS:
- Go to System Preferences > Sharing.
- Select Internet Sharing from the left menu.
- Share your connection from NordVPN (usually displayed as WiFi or Ethernet).
- To computers using Wi-Fi, check the corresponding box.
- Click Wi-Fi Options to set your Network Name and Password.
- Click Start to enable sharing.
- Connect Samsung TV to WiFi Hotspot:
- Go to Settings > Network > Network Settings on your TV.
- Select your computer’s WiFi hotspot from the list.
- Enter the Network Password you configured and connect.
Advantages of Using NordVPN on Your Samsung TV
There are numerous VPNs on the market that claim to offer the best security-enhancement features on the market, but out of all these VPNs, only a few stand out at the fore. NordVPN is one of them, and for good reason. Here are a few advantages that you stand to gain by pairing this VPN with your Smart TV.
1. The Best Security Features You Can Ask For
NordVPN is quite big on security and didn’t come to play when it rolled out its security features. The service offers about 6 features that help you keep your Samsung Smart TV and other devices secure. Of all these security features, the most important is the DoubleVPN feature that offers you double encryption to protect your data. There’s also the OpenVPN feature, the Kill Switch that activates when your connection to the VPN gets cut off abruptly, and the trustworthy No-Logs Policy that is their seal of commitment to keeping your data safe.
2. Easy Unblockability for Streaming Services
The ability to unblock streaming services is a critical feature of any VPN. NordVPN efficiently unblocks the most popular and highly-coveted streaming apps on the block. With NordVPN, you would have no problems accessing Netflix, BBC iPlayer, Hulu, Amazon Prime, Roku, and many others. With over 5400 servers in 59 countries worldwide, unblocking geo-restricted sites is not a difficult task. Stream these services directly on your Samsung Smart TV with NordVPN.
3. Say Goodbye to Ads
NordVPN is laden with features that take away even the littlest streaming challenge you may face. For example, ads. NordVPN has an Ad blocker that does the job of getting rid of those pesky ads that plague your streaming session or internet activities. No more pop-up banner ads, no more video ads to interrupt your shows as you watch, and definitely no more risk of third-party data thieves.
Understanding the Limitations of Samsung Smart TVs with NordVPN
Samsung Smart TVs operate on the Tizen OS, which does not natively support VPN applications. This limitation means that installing NordVPN directly onto your Samsung TV isn’t feasible. However, alternative methods exist to integrate NordVPN on Samsung TV, such as configuring it through a router or using the SmartDNS feature.
It’s essential to recognize that while these methods enable access to geo-restricted content, they may not offer the full encryption benefits of a direct VPN connection. Therefore, assessing your primary needs—whether it’s content access or enhanced security—will guide you in choosing the most suitable setup for NordVPN on your Samsung TV.
Moreover, understanding these limitations helps in setting realistic expectations regarding the functionality and security features available when using NordVPN on Samsung TV.
How to Troubleshoot Common NordVPN Samsung TV Setup Issues
Sometimes, even after following all setup instructions, users may encounter issues when using NordVPN on their Samsung Smart TV. One common issue is the inability to access certain apps after installation. To troubleshoot, ensure that the NordVPN app is properly configured, and check whether the server location matches the content you are trying to access.
Another issue could be slow speeds while streaming. This can be resolved by selecting a server that is geographically closer to your location. Additionally, ensure that your internet connection speed is adequate for streaming in high definition.
If the SmartDNS method isn’t working as expected, verify that your DNS settings on the Samsung Smart TV are correct. You may need to re-enter the SmartDNS server addresses provided by NordVPN.
In case your router configuration is causing problems, it may be helpful to restart both your router and Samsung Smart TV to reset the VPN connection and ensure proper functionality.
What to Expect from NordVPN’s Streaming Performance on Samsung Smart TV
NordVPN on Samsung TV delivers exceptional streaming performance, particularly when utilizing the VPN app directly or sharing a connection via an Amazon Fire device, ensuring a secure and seamless viewing experience. You can expect high-quality streaming from popular platforms like Netflix, Hulu, and BBC iPlayer without buffering or lag.
The speed and quality of streaming depend largely on the server location you connect to. Opt for servers located in regions with less traffic to ensure that your streaming experience remains uninterrupted.
NordVPN also supports fast connections through its SmartDNS feature, which is perfect for users who don’t require encryption but want to access content from geo-restricted platforms.
To maximize streaming quality, always ensure your Samsung Smart TV is connected to a stable internet connection and that you are using the most optimal server for your location.
Alternative Methods to Install NordVPN on Samsung TV
In addition to the primary methods for installing NordVPN on Samsung Smart TV, users can explore alternative techniques. One such method is installing NordVPN on an Apple TV or Android TV and using the AirPlay or casting features to stream content to your Samsung Smart TV.
Another approach is setting up NordVPN on your home router, which secures all devices connected to your home network, including your Samsung Smart TV. This method provides a consistent and reliable connection for uninterrupted streaming and browsing.
Users who prefer using a gaming console can also configure NordVPN on a PlayStation or Xbox and then connect the console to their Samsung Smart TV for seamless streaming from various services.
If you own a Smart TV that does not support Android or Tizen OS, another option is to install NordVPN on your laptop or PC and then share the connection over Wi-Fi or Ethernet to your Samsung Smart TV.
Final Thoughts: Why Install NordVPN on Samsung TV?
Setting up NordVPN on Samsung TV may seem challenging at first, but with the variety of easy-to-follow methods detailed in this guide, anyone can effortlessly enhance their streaming and browsing experience. Whether you’re installing NordVPN on Samsung TV through the Android app, leveraging the convenience of SmartDNS, or extending protection via a router, you’ll enjoy secure, private access to geo-blocked content from all over the world.
Understanding the limitations of NordVPN Samsung TV compatibility with the Tizen OS ensures you select the most effective installation method tailored to your needs. Additionally, you’ve learned about the numerous benefits of using NordVPN on Samsung TV, from robust security and enhanced privacy to seamless, buffer-free streaming performance. Troubleshooting common issues like slow streaming speeds and connection problems was also covered, giving you all the knowledge necessary to maximize your VPN’s capabilities.
Ultimately, setting up NordVPN on Samsung TV is an investment in your privacy, security, and entertainment. With straightforward installation methods and numerous advantages, there’s no reason not to protect your streaming sessions and explore the extensive world of unrestricted content that NordVPN unlocks for Samsung Smart TV users.
Top 5 Best VPNs for Samsung TV in 2026
ExpressVPN
Overall score: 9.8
- 3,200 servers across 105 countries
- Works with streaming platforms
- AES 256-bit encryption
- Supports private protocol, Lightway
- Money-back guarantee
30-day money-back guarantee
NordVPN
Overall score: 9.6
- 8,700+ servers available in 129 countries
- Connect up to 10 devices simultaneously
- Great security features
- Verified no-logs policy
- Unblocks streaming platforms
30-day money-back guarantee
Surfshark
Overall score: 9.5
- 4,500+ servers in 100+ countries
- Allows unlimited simultaneous connections
- Integrates stealth mode
- Multihop feature available
- Webcam protection from unauthorized apps
30-day money-back guarantee
Proton VPN
Overall score: 9.4
- 17,250+ servers in 125 countries
- Free version available
- Strong security features
- Reliable no-logs policy
- Allows Perfect Forward Secrecy
30-Day Money-Back Guarantee
CyberGhost
Overall score: 9
- 9,300+ reliable servers in 100 countries
- 45-day money-back guarantee
- Strict no-log policy
- Tough security features
45-Day Money-Back Guarantee
NordVPN on Samsung TV: Related Articles
- How to Setup and Use NordVPN on Android TV
- How to Setup and Use NordVPN on AppleTV
- How to Setup and Use NordVPN on Chromecast
- How to Setup and Use NordVPN on Synology
- How to Setup and Use NordVPN on Xbox Series X
Join the TechRobot Newsletter
Actionable tips on online security, the best VPNs, unblocking guides, and special offers — straight to your inbox.
Related Posts
- NordVPN Review | January 2026
- How Much Does NordVPN Cost in 2026? All Updated Plans and Pricing
- NordVPN Coupon and Discount Code 2026 | Get 70% Off NordVPN
- How to Get NordVPN Threat Protection Pro: Guide to Advanced Online Security
- NordVPN Black Friday 2025: Save Big NordVPN Threat Protection
- NordPass Review 2026: Best Password Manager vs Top Competitors | Full Guide + Pricing Breakdown
- NordVPN Duo: All About the New Two-User Plan – Pricing, Features & More!
- Cookie Theft: The Silent Cyber Threat You Need to Know About
- How to Cancel NordVPN in 2026
- How to Set Up and Use NordVPN on Xbox Series X

