How to Set Up and Use NordVPN on Synology (Updated 2026)
NordVPN’s reputation makes it an easy choice when it comes to protecting your devices that connect to the internet. Like every other top VPN, it delivers on all fronts. The primary purpose of any VPN is to pave a secure path to the internet, and NordVPN is not slacking on this end. A slew of security features ensures its subscribers have no iota of worry connecting to the internet. Apart from security, its support for several devices is another reason why VPN users highly recommend it.
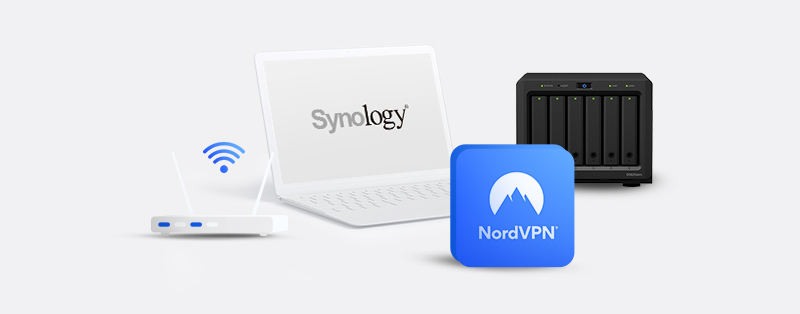
Similar to NordVPN, Synology is an elite player in its industry–Network-Attached Storage (NAS). A NAS device, in simple terms, is a server that is only involved in file-storage and file-sharing activities. Since NAS devices are usually connected to a network and act as a central storage area users can access files, it is only fitting that a VPN protects all traffic going in and out of it. This article will guide you in setting up a NordVPN Synology system altogether.
Get NordVPN for Synology
Setting Up a NordVPN Synology System
Synology’s main product is the DiskStation which runs on the DiskStation Manager (DSM) operating system. Depending on your Synology product, the NordVPN configuration process might differ. This article will guide you in setting up NordVPN on DSM version 5.1 and 6.1.
Setting Up NordVPN on Synology 5.1
Follow the instructions below to set up NordVPN on Synology DSM 5.1:
1. The first step is to access your Synology NAS admin panel and click on “Control Panel.”
2. Under the “Connectivity” section, click on “Network.”
3. Click the “Create” tab under the “Network Interface” section and create a new VPN profile.
4. You should see a “Create Profile” window pop up, select “OpenVPN,” and click the “Next” button.
5. Next, you will need to download NordVPN’s CA certificates and extract them.
6. Once that’s over, go back to the webpage of your panel and fill in the details:
Profile name: A name to describe the profile
Server address: Hostname of the NordVPN server you intend to use
User name: Your NordVPN service username
Password: Your NordVPN service password
Port: 1194 (recommended)
Protocol: UDP (NordVPN recommends using UDP instead of TCP)
Certificate: upload the CA certificate of the server you intend to use
If you don’t know your NordVPN service credentials, you can copy them from your Nord Account dashboard. Also, you can check the hostname of the NordVPN server you want to use on this page. Click the “Next” button after.
7. Under “Advanced Settings,” select all the options and click “Apply” after.
8. Once you’re back to the “Network Interface” section, you should see the profile you created. If you expand it, you should see an error that indicates the connection is not active. This means you need to configure the OpenVPN profile on your Synology NAS device manually. To do that, you need to access the device through SSH as root.
9. On the sidebar menu, expand the “System” section and select “Terminal & SNMP.” Enable SSH by clicking on the box beside “Enable SSH service” and click “Apply.”
10. Go to Terminal/Command Prompt/PowerShell on your computer and input the following:
ssh root@(IP of your synology device)
Then type in the admin password of your Synology device.
11. Once you have access to the device, enter the following commands to go to the OpenVPN directory and display the contents:
cd /usr/syno/etc/synovpnclient/openvpn
ls -al
12. You should see a .crt file. Let’s assume it is us8309_nordvpn_com_ca.crt. That is the CA certificate you uploaded in step six above. You should also see a client_ (contains the OpenVPN configuration) and ovpnclient.conf (contains the Synology setup for OpenVPN connections) file.
13. Enter the following command to create a new file with the tls-auth key of that certificate as its content:
vi us8309_nordvpn_com_tls.key
This should open up the vim editor to edit the file’s contents(it will be empty).
14. Go back to the folder you downloaded in step 5, look for the same server’s tls auth key, open it and copy the contents to the file you just created.
15. Press the “Escape” key on your keyboard and type “:wq” to save the contents and close the editor.
16. Input the “ls -al” command to display the files. You should see the file you just created. Enter “vi client_….” to open the client_ file in step 12.
17. Now append the following to the file:
cipher AES-256-CBC
remote-cert-tls server
auth SHA512
tls-auth us8309_nordvpn_com_tls.key 1
tun-mtu 1500
tun-mtu-extra 32
mssfix 1450
persist-key
persist-tun
ping 15
ping-restart 0
ping-timer-rem
log-append /volume1/tmp/NordVPN.log
Note that you need to replace the us8309_nordvpn_com_tls.key on the 4th line above with your tls auth file’s name.
18. Enter “:wq” to save and exit the text editor.
19. Go back to your admin panel and click “Connect” on the profile you created at step six above. You should see “Connected” if it is successful.
Note that the files in step twelve will have different names as above if you’re using a different server. Make sure to adjust it accordingly when configuring NordVPN on your Synology DSM 5.1 device.
Setting Up NordVPN on Synology 6.1 and Later
The process of setting up NordVPN on Synology DSM 6.1 and later is easier. Let’s take a look at it.
1. Log in to the admin panel of your Synology device, click on “Control Panel,” and select “Network” under the “Connectivity” section.
2. Click on “Network Interface,” select “Create,” then “Create VPN profile.”
3. A “Create Profile” window should pop up. Select “OpenVPN (via importing a .ovpn file)” as the VPN connection method and click the “Next” button.
4. Head over here to download the OpenVPN configuration file of the server you intend to use or let NordVPN recommend a server for you.
5. Go back to the “Create Profile” window and input the following and click the “Next” button:
Profile name: A name to describe the profile.
User name: Your NordVPN service username
Password: Your NordVPN service password
Import .ovpn file: Import the .ovpn configuration you downloaded
CA certificate: Leave blank
6. On the next page, tick all the options and click the “Apply” button.
7. Select the profile you just created and click on the “Connect’ button at the top of the page. The connection status of your newly created profile should change to connected. If it doesn’t work, find the .ovpn configuration file you downloaded and add the following line to it:
log-append /var/log/NordVPN.log
Save it, import it again, and try the connection once more. If it doesn’t work, get the log file at /var/log/NordVPN.log and reach out to NordVPN’s support team.
Get NordVPN for Synology
Advantages of Using a NordVPN Synology Hybrid
Here are the perks of using NordVPN on Synology:
1. Security
Like every other device that connects to the internet, Synology devices are at risk of data exposure. With the advancement in technology, malicious actors have more resources to initiate attacks. Using NordVPN on these devices ensures they are not attractive to malicious attackers. IP masking is significant against ISPs or hackers tracking your connection.
NordVPN’s security features provide a barrier of protection against any threats to your network. AES-256 encryption ensures a secure connection, and an automatic kill switch ensures data is always protected. In addition, perfect forward secrecy ensures encryption keys are not the same for every session. Other features like Double VPN, CyberSec, Split Tunneling, and Onion over VPN are also available for use. External security experts have also audited NordVPN, proving that this VPN is committed to keeping your devices safe.
2. Privacy
Privacy is equally as important as security. Using a VPN with a shady privacy policy is a risky affair. NordVPN’s privacy policy does not leave any chance for ambiguity; it is straightforward and easy to understand. Operating from privacy-friendly Panama gives room for NordVPN to adhere to its privacy policy.
Panama does not participate in sharing surveillance information with other governments. You’re not at risk of the government implementing policies that require VPNs to store or share your data with government agencies. DNS/IPv6/WebRTC leak protection is another crucial feature that maintains privacy because it prevents your original IP address from unwanted exposure.
3. Customer Support
VPN users need to trust that whenever there is a problem, a support team with the ability to help is always available. NordVPN’s customer support team is one you can depend on. They are reliable, and knowledgeable, and provide lasting solutions to any issues you might encounter using NordVPN on Synology. The first point of contact is usually a chatbot, then live chat agents are available 24/7. It also has a ticketing system, a help center, setup guides, and FAQs to aid users.
Frequently Asked Questions on How to Set Up and Use NordVPn on Synology
Synology NAS, or simply NAS, is an acronym for Network Attached Storage. This service gives you an automated storage device that saves your files, photographs, videos, and music to the network of your choice.
NAS is ideal if you want to modernize your home and digitize your information. On the other hand, VPNs are great for people who want to feel more secure while browsing the web. This is because you can use a VPN to encrypt your IP address and protect your information. Therefore, it is much better to use a private network.
Synology lets you access all your essential files anywhere in the world, and to do this securely, you need a VPN like NordVPN that secures and protects all of your files.
With NordVPN, you can easily access your files from anywhere in the world with its over 5,100 servers. However, if you travel to another country and need to access your files quickly, geo-restriction may prevent some of your files from being accessed. This is when NordVPN comes to the rescue. It will let you access or share your files or data with anyone, anywhere in the globe.
NordVPN will also keep all of your activities, data, and information safe and secure. It offers features such as strong encryption, DNS leak protection, and an automatic kill switch. All of these features help to keep you anonymous, saving you from the risk of data theft.
No, using a free VPN with Synology is not recommended. You can try some free VPNs, but I doubt you’ll be happy with the results. Free VPNs don’t have the server networks or privacy capabilities to meet your demands, so they’re not a smart choice for Synology. Instead, go with a premium service like NordVPN and try it out risk-free (it comes with a 30-day money-back guarantee).
Conclusion
Since NordVPN supports Synology’s NAS devices, there’s no need to look elsewhere; the safety of your files is in good hands. It is important to know the version of your Synology DSM operating system when you want to set up NordVPN on your device. We hope that this article’s instructional material will guide you in setting up NordVPN on your Synology device with ease.