How to Set Up and Use NordVPN on pfSense (Updated 2026)
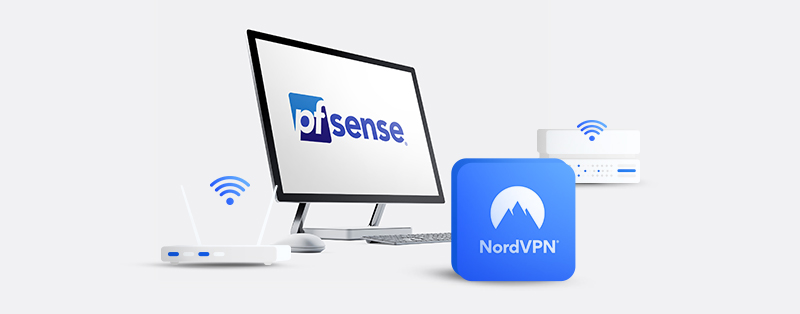
pfSense is an open-source software distribution that can turn a computer into a dedicated router/firewall. It usually operates on a virtual machine or a dedicated physical computer. It is FreeBSD-based, which means it belongs to the family Unix-like BSD distribution. Using a VPN on pfSense enhances its abilities to protect your devices. This article takes a deep dive into configuring NordVPN on pfSense.
Setting Up NordVPN on pfSense
pfSense has different versions, but the latest one is the 2.5.0 version. This new version has an in-built WireGuard VPN client. Unfortunately, NordVPN’s proprietary WireGuard-based protocol is not available for routers. So this setup involves using the OpenVPN protocol to connect to NordVPN’s servers. Let’s take a look at the step-by-step process you need to follow.
1. Open a browser window and log in to your pfSense account with your credentials. The default is usually “admin” for the username and “pfsense” for the password. Reach out to pfSense support or check your user manual if that doesn’t work.
2. Navigate to the certificate authority section through the following path: System > Certificate Manager > CAs. Once you’re in the CA section, click “+Add.”
3. You’re going to need the name of the server in the next steps. So head over to NordVPN’s OpenVPN configurations page and note the name of the server you intend to use or let NordVPN recommend a server for you.
4. Go back to your pfSense page and input the following in their respective fields:
Descriptive Name: NordVPN_CA (this is for this guide, you can use any name)
Method: Import an existing Certificate Authority
Trust Store: Uncheck this box
Randomize Serial: Uncheck this box
Certificate data: copy and paste the data below.
—–BEGIN CERTIFICATE—–
MIIFCjCCAvKgAwIBAgIBATANBgkqhkiG9w0BAQ0FADA5MQswCQYDVQQGEwJQQTEQ
MA4GA1UEChMHTm9yZFZQTjEYMBYGA1UEAxMPTm9yZFZQTiBSb290IENBMB4XDTE2
MDEwMTAwMDAwMFoXDTM1MTIzMTIzNTk1OVowOTELMAkGA1UEBhMCUEExEDAOBgNV
BAoTB05vcmRWUE4xGDAWBgNVBAMTD05vcmRWUE4gUm9vdCBDQTCCAiIwDQYJKoZI
hvcNAQEBBQADggIPADCCAgoCggIBAMkr/BYhyo0F2upsIMXwC6QvkZps3NN2/eQF
kfQIS1gql0aejsKsEnmY0Kaon8uZCTXPsRH1gQNgg5D2gixdd1mJUvV3dE3y9FJr
XMoDkXdCGBodvKJyU6lcfEVF6/UxHcbBguZK9UtRHS9eJYm3rpL/5huQMCppX7kU
eQ8dpCwd3iKITqwd1ZudDqsWaU0vqzC2H55IyaZ/5/TnCk31Q1UP6BksbbuRcwOV
skEDsm6YoWDnn/IIzGOYnFJRzQH5jTz3j1QBvRIuQuBuvUkfhx1FEwhwZigrcxXu
MP+QgM54kezgziJUaZcOM2zF3lvrwMvXDMfNeIoJABv9ljw969xQ8czQCU5lMVmA
37ltv5Ec9U5hZuwk/9QO1Z+d/r6Jx0mlurS8gnCAKJgwa3kyZw6e4FZ8mYL4vpRR
hPdvRTWCMJkeB4yBHyhxUmTRgJHm6YR3D6hcFAc9cQcTEl/I60tMdz33G6m0O42s
Qt/+AR3YCY/RusWVBJB/qNS94EtNtj8iaebCQW1jHAhvGmFILVR9lzD0EzWKHkvy
WEjmUVRgCDd6Ne3eFRNS73gdv/C3l5boYySeu4exkEYVxVRn8DhCxs0MnkMHWFK6
MyzXCCn+JnWFDYPfDKHvpff/kLDobtPBf+Lbch5wQy9quY27xaj0XwLyjOltpiST
LWae/Q4vAgMBAAGjHTAbMAwGA1UdEwQFMAMBAf8wCwYDVR0PBAQDAgEGMA0GCSqG
SIb3DQEBDQUAA4ICAQC9fUL2sZPxIN2mD32VeNySTgZlCEdVmlq471o/bDMP4B8g
nQesFRtXY2ZCjs50Jm73B2LViL9qlREmI6vE5IC8IsRBJSV4ce1WYxyXro5rmVg/
k6a10rlsbK/eg//GHoJxDdXDOokLUSnxt7gk3QKpX6eCdh67p0PuWm/7WUJQxH2S
DxsT9vB/iZriTIEe/ILoOQF0Aqp7AgNCcLcLAmbxXQkXYCCSB35Vp06u+eTWjG0/
pyS5V14stGtw+fA0DJp5ZJV4eqJ5LqxMlYvEZ/qKTEdoCeaXv2QEmN6dVqjDoTAo
k0t5u4YRXzEVCfXAC3ocplNdtCA72wjFJcSbfif4BSC8bDACTXtnPC7nD0VndZLp
+RiNLeiENhk0oTC+UVdSc+n2nJOzkCK0vYu0Ads4JGIB7g8IB3z2t9ICmsWrgnhd
NdcOe15BincrGA8avQ1cWXsfIKEjbrnEuEk9b5jel6NfHtPKoHc9mDpRdNPISeVa
wDBM1mJChneHt59Nh8Gah74+TM1jBsw4fhJPvoc7Atcg740JErb904mZfkIEmojC
VPhBHVQ9LHBAdM8qFI2kRK0IynOmAZhexlP/aT/kpEsEPyaZQlnBn3An1CRz8h0S
PApL8PytggYKeQmRhl499+6jLxcZ2IegLfqq41dzIjwHwTMplg+1pKIOVojpWA==
—–END CERTIFICATE—–
Click on “Save” to save the configuration.
5. Now go to VPN > OpenVPN > Clients and click on “+Add.”
6. Enter the following in their respective fields:
Disable this client: Uncheck this box.
Server mode: Peer to Peer (SSL/TLS)
Protocol: UDP on IPv4 only (you can also use TCP)
Device mode: tun – Layer 3 Tunnel Mode
Interface: WAN
Local port: Leave box unchecked
Server host or address: the hostname of the server you selected in step 3 above
Server port: 1194 (use 443 if you use TCP)
Proxy host or address: Leave box unchecked
Proxy port: Leave box unchecked
Proxy Authentication: none
Description: Input any descriptive name of your choice.
7. In the “User Authentication Settings” section, input the following:
Username: Your NordVPN service username
Password: Your NordVPN service password in both fields
Authentication Retry: leave box unchecked
If you don’t know your NordVPN service credentials, you can find them in your NordAccount dashboard under “Advanced configuration.”
8. In the “Cryptographic Settings” section, input the following:
TLS Configuration: Use a TLS Key – Check this box; Automatically generate a TLS key – Uncheck this box
TLS Key: Copy and paste the data below
—–BEGIN OpenVPN Static key V1—–
e685bdaf659a25a200e2b9e39e51ff03
0fc72cf1ce07232bd8b2be5e6c670143
f51e937e670eee09d4f2ea5a6e4e6996
5db852c275351b86fc4ca892d78ae002
d6f70d029bd79c4d1c26cf14e9588033
cf639f8a74809f29f72b9d58f9b8f5fe
fc7938eade40e9fed6cb92184abb2cc1
0eb1a296df243b251df0643d53724cdb
5a92a1d6cb817804c4a9319b57d53be5
80815bcfcb2df55018cc83fc43bc7ff8
2d51f9b88364776ee9d12fc85cc7ea5b
9741c4f598c485316db066d52db4540e
212e1518a9bd4828219e24b20d88f598
a196c9de96012090e333519ae18d3509
9427e7b372d348d352dc4c85e18cd4b9
3f8a56ddb2e64eb67adfc9b337157ff4
—–END OpenVPN Static key V1—–
TLS Key Usage Mode: TLS Authentication
TLS keydir direction: Use default direction
Peer certificate authority: NordVPN_CA (the CA in step 4 above)
Peer Certificate Revocation list: Do not define
Client certificate: webConfigurator default (59f92214095d8) (Server: Yes, In Use). It is important to note that the numbers on your machine might not be the same.
Data Encryption Negotiation: Check this box
Data Encryption Algorithms: AES-256-GCM and AES-256-CBC
Fallback Data Encryption Algorithm: AES-256-CBC
Auth digest algorithm: SHA512 (512-bit)
Hardware Crypto: No Hardware Crypto Acceleration
9. In the “Tunnel Settings” section, input the following:
IPv4 tunnel network: Leave blank
IPv6 tunnel network: Leave blank
IPv4 remote network(s): Leave blank
IPv6 remote network(s): Leave blank
Limit outgoing bandwidth: Leave blank
Allow Compression: Refuse any non-stub compression (Most Secure)
Topology: Subnet – One IP address per client in a common subnet
Type-of-Service: Uncheck this box
Don’t pull routes: Uncheck this box
Don’t add/remove routes: Check this box
10. In the “Advanced Configuration” section, input the following:
Custom Options: Copy and paste the data below
tls-client;
remote-random;
tun-mtu 1500;
tun-mtu-extra 32;
mssfix 1450;
persist-key;
persist-tun;
reneg-sec 0;
remote-cert-tls server;
UDP FAST I/O: Uncheck this box
Exit Notify: Disabled
Send/Receive Buffer: Default
Gateway creation: IPv4 only
Verbosity level: 3 (recommended)
11. Now go to Interfaces > Interface Assignments. Click on the green “+Add” button to add the NordVPN interface.
12. Select the “OPT1” on the left of your assigned interface input the following in their respective fields:
Enable: Check this box
Description: NordVPN
Mac Address: Leave blank
MTU: Leave blank
MSS: Leave blank
13. Leave everything else and select “Save.”
14. Go to Services -> DNS Resolver -> General Settings and input the following in their respective fields and select “Save”:
Enable: Check this box
Listen port: Ignore this field
Enable SSL/TLS Service: Uncheck this box
SSL/TLS Certificate: webConfigurator default (59f92214095d8) (Server: Yes, In Use). It is important to note that the numbers on your machine might not be the same
SSL/TLS Listen Port: Ignore this field
Network Interfaces: All
Outgoing Network Interfaces: NordVPN
System Domains Local Zone Type: Transparent
DNSSEC: Uncheck this box
Python Module: Uncheck this box
DNS Query Forwarding: Enable forwarding mode – Check this box; Use SSL/TLS for outgoing DNS Queries to Forwarding Servers – Uncheck this box
DHCP Registration: Check this box
Static DHCP: Check this box
OpenVPN Clients: Uncheck this box
15. At the top of “General DNS Resolver Options,” click “Advanced Settings” and input the following in their respective fields and click “Save”:
ADVANCED PRIVACY OPTIONS:
Hide Identity: Check this box
Hide Version: Check this box
Query Name Minimization: Uncheck this box
Strict Query Name Minimization: Uncheck this box
ADVANCED RESOLVER OPTIONS:
Prefetch Support: Check this box
Prefetch DNS Key Support: Check this box
Harden DNSSEC Data: Uncheck this box
16. Go to Firewall > NAT > Outbound, click “Manual Outbound NAT rule generation,” and select “Save.” You will see six rules. Delete every IPv6 rule, add a new one with the following and click “Save”:
Interface: NordVPN
Address Family: IPv4
Source: Input your LAN subnet (something like 192.168.1.0/24)
Note the NAT rule you just created must be on top.
17. Go to Firewall > Rules > LAN and remove the IPv6 rule. Edit the IPv4 rule by clicking on “Display Advanced” and changing “Gateway” to “NordVPN.” Click “Save” after.
18. Head over to “System > General Setup.” Under “DNS Server Settings,” enter the following in their respective fields and click “Save”:
DNS Server 1: 103.86.96.100; none (under “Gateway”)
DNS Server 2: 103.86.99.100; NordVPN_VPNV4 – opt1 – … (under “Gateway”)
19. Now go to Status > OpenVPN and check to see if the connection is up and running. You can also look at your connection log file by navigating to Status > System Logs > OpenVPN.
You can confirm that your VPN connection is active by checking your connection’s IP address to see if it has changed.

Get NordVPN for pfSense
Why Should You Use NordVPN For pfSense?
1. Security and Privacy
NordVPN’s security structure consists of basic and advanced features. It uses the OpenVPN protocol, which is one of the most secure and reliable VPN protocols. Using 256-bit encryption is an effective way to discourage malicious entities from trying to access your data, and NordVPN uses it to protect your network connection. There is also a perfect forward secrecy feature that makes it even more difficult to penetrate your network.
Other important security features include an automatic Kill Switch, Split Tunneling, DNS/IP leak protection, Onion over VPN, DoubleVPN, and CyberSec (an adblocker). Privacy is also its strong point as it keeps no logs, has a cryptocurrency payment method, and has its headquarters in privacy-friendly Panama. Overall, NordVPN provides adequate protection when it comes to privacy and security.
2. Bypass Geo-Restrictions
NordVPN’s impressive server network is the reason why its users can confidently access several streaming platforms without facing any barriers online. It can unblock almost every mainstream streaming service, including Netflix, BBC iPlayer, ESPN, Amazon Prime Video, and Hulu.
3. Reliable Customer Support
Nobody wants to be stuck on a problem and have no one around to help. This is why NordVPN invests in delivering the best support to its users. If you have any issues setting it up on pfSense, you can access a 24/7 live chat system, a ticketing system, FAQs, and a support center with instructional guides.
Frequently Asked Questions on Setting up and Using NordVPN on Pfsense
Will using NordVPN on Pfsense make me completely anonymous online?
No, there is nothing that can make you completely anonymous online, except you isolate your computer and not connect to the internet. While you cannot achieve a hundred percent anonymity, NordVPN has privacy features that can give you a high level of anonymity, such as Double VPN, Tor over VPN, and a watertight zero-log policy. In addition, its headquarters is in Panama, a privacy-friendly territory. So, using NordVPN on Pfsense will not make you completely anonymous, but it will do a good job of reducing your digital footprint online and making it harder for bad actors to track you.
Can I use a free VPN instead of NordVPN on Pfsense?
Yes, you can use a free VPN instead of NordVPN on Pfsense, but we recommend you stick with NordVPN. With free VPNs, you run the risk of malware infection as some of them have been discovered on Google PlayStore to spread malware. In addition, you will discover there are not many VPNs that can work on Pfsense because of its complex configuration process. Furthermore, almost all free VPN services have limitations on speed, bandwidth, server network, etc. Using NordVPN on Pfsense is way better than using the best free VPN service.
Will using NordVPN on Pfsense protect me against malware?
It depends on the sophistication of malware. NordVPN can never be an alternative to an anti-malware application. The best NordVPN can do is protect you from basic network threats that look to infiltrate your network or ads that contain malware. Its CyberSec feature blocks unwanted ads and known malicious sites. It cannot prevent advanced malware with sophisticated techniques. It is better to get a standalone anti-malware software than depend on NordVPN for protection.
Is it illegal to use NordVPN on Pfsense?
It is certainly not illegal to use NordVPN on Pfsense or any other device. NordVPN is an application meant to keep your internet connection secure, and many countries have no issues with it. However, there are a few countries that work relentlessly against VPNs. You might have to be careful in such countries.
Conclusion
Setting up NordVPN on pfSense is not an easy process, but if you follow the instructions in this guide accurately, you should have no issues with it. In terms of security, privacy, unblocking streaming platforms, and reliable support, you stand to gain a lot using NordVPN on pfSense.