How to Set Up and Use Surfshark on Apple TV (Updated 2026)
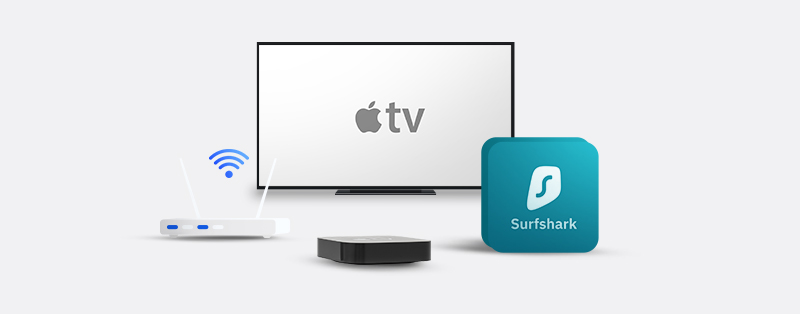
Apple TV is a small box you connect to your TV that gives you access to several streaming platforms, including Apple’s original content. It bridges the gap between traditional TVs and Smart TVs. Using Surfshark on Apple TV gives you added security and privacy. It also permits access to country-specific content you otherwise don’t have access to, among other things. This article will dwell on the different ways you can set up and use Surfshark on Apple TV.
Setting Up Surfshark on Apple TV
Surfshark does not have a standalone application for Apple TV. There are three different ways you can set it up on your Apple TV.
1. You can set it up through Smart DNS. This method doesn’t offer complete protection for your Apple TV.
2. You can set it up through a PC. This method is easy and straightforward but requires connecting your Apple TV to your personal computer by setting up a Wi-Fi hotspot on your computer.
3. You can set it up via a router. This method is the most complex and requires configuring a router.
All these methods come with different complexity levels and range from easy to complex, depending on your technical knowledge. You don’t have to worry about any method’s complexity as this article guides you through every step of each method.
Get Surfshark for your Apple TV
Setting Up a Connection Through Smart DNS
Smart DNS or Smart DNS proxy is a Surfshark feature that allows you to change the DNS servers of your local connection to Surfshark’s DNS servers. This allows you to take advantage of the location of those servers so you can access geo-restricted content. While this method will allow you access to platforms you could not previously access, it does not offer any form of security or privacy. Let’s take a look at the step-by-step process involved in using Smart DNS for Apple TV.
1. Get access to your Surfshark account. If you do not already have a Surfshark subscription, head over to its website and purchase a subscription plan.
2. On the “My Account” page, expand the VPN tab on the sidebar, and click “Smart DNS.”
3. At this point, ensure that you’re not connected to the VPN because Surfshark will detect your IP address to use it to activate Smart DNS. To turn on Smart DNS, click the “Activate Smart DNS” button at the end of the page.
4. Once activated, two Smart DNS IP addresses will be on your screen. Select one of them.
5. On your Apple TV, navigate to settings and select “Network.”
6. Select the tab of your internet connection (Wi-Fi or Ethernet), then click on the name of your network.
7. Navigate to “Configure DNS” and click it.
8. Since we need to configure it manually, choose “Manual” and not “Automatic.”
9. Now input any of the DNS addresses in step four above and click “Done” to complete the process.
10. Restart your Apple TV.
You can see that it’s not complex to set up Smart DNS. However, if you need security and not just looking to bypass geo-restrictions, this method is not adequate.
Setting Up a Connection Through Your PC
You can set up Surfshark on your Apple TV via your personal computer in different ways. Still, the most popular one is by creating a virtual hotspot on your computer so you can share your internet connection with Apple TV. Let’s take a look at the processes involved in making your computer a virtual router on Windows 10.1
1. On your system, go to your computer’s settings page and select “Network and Internet” on the menu.
2. Head over to “Mobile Hotspot” and select it to turn it on.
3. Then scroll down and select the “Change adapter options” under “Related settings.”
4. On your VPN connection, right-click it and select “Properties.”
5. A new window will pop up. At the top of that window, click on the “Sharing” tab.
6. Select the “Allow other network users to connect through this computer’s internet connection” box.
7. Click on the dropdown menu below, select the hotspot network you just created and click the “OK” button.
8. Now go to your Apple TV and connect to the Wi-Fi hotspot you just created.
That’s how simple it is to create a virtual hotspot on your Windows 10 computer. Now let’s take a look at how you can do the same on macOS computers.
1. Open System Preferences on your computer and select “Sharing.”
2. Choose the “Internet Sharing” option in the list to the left side of the window.
3. In the “Share your connection from” list, select your Surfshark VPN connection.
4. In the “To the computers using” list, select the “Wi-Fi” option. This is to create a Wi-Fi hotspot. It just means that anyone connecting to your Wi-Fi network will have access to the connection in step 3.
5. Now click the “Wi-Fi Options” button to configure your Wi-Fi hotspot.
6. The default settings are adequate, but you might want to change some settings like “Password” and “Network Name.” Always ensure you set the “Security” option to WPA2 Personal.
7. Click “OK” and select “Start” on the following pop-up window.
8. Now go to your Apple TV and connect to the Wi-Fi hotspot you just created.
The only limitation with this method is that you cannot connect to a Wi-Fi network and host one simultaneously. It is important to note that you need an active Surfshark VPN connection at the start of these processes (whether Windows 10 or macOS).
Setting Up a Connection Through Your Router
Setting up a Surfshark connection on your Apple TV through a router can be somewhat technical, but it offers complete protection. The first thing to consider before starting the configuration process is to ensure Surfshark supports your router. On this page, Surfshark has a list of routers it does not support.
The good news is that you can get pre-configured routers from FlashRouters. Pre-configured routers take away the technical process involved in setting up a router by yourself. However, if you cannot afford one, any router you get must support the OpenVPN Client before configuring Surfshark on it. Let’s take a look at configuring Surfshark on custom DD-WRT router firmware.
1. Get a Surfshark subscription and go to this page to get your service credentials. You will see your service credentials under the “Credentials” tab.
2. Under the “Files” tab, you will see a list of servers. Copy the hostname of the server you choose somewhere.
3. Access your router’s admin panel by inputting the IP address (usually 192.168.1.1) in a browser and entering the username and password (usually admin).
4. Select the “Setup” tab and navigate to “Network Address Server Settings (DHCP),” and input the following:
Static DNS 1: 162.252.172.57
Static DNS 2: 149.154.159.92
Static DNS 3: 0.0.0.0 (default)
Use DNSMasq for DHCP: ✔
Use DNSMasq for DNS: ✔
DHCP-Authoritative: ✔
5. Next, select the “Services” tab. Under the “VPN” tab, enable “OpenVPN Client” and input the following:
Port: 1194
Tunnel Device: TUN
Tunnel Protocol: UDP
Encryption Cipher: None
Hash Algorithm: SHA-512
User Pass Authentication: Enable
Username: Your Surfshark service username
Password: Your Surfshark service password
Advanced Options: Enable
TLS Cipher: None
LZO Compression: Disabled
NAT: Enable
6. In the “Additional Config” field, add the following:
remote-cert-tls server
remote-random
nobind
tun-mtu 1500
tun-mtu-extra 32
mssfix 1450
persist-key
persist-tun
ping-timer-rem
reneg-sec 0
cipher AES-256-GCM
auth SHA512
log /tmp/vpn.log
7. Go to your Surfshark account to download the CA certificate and TLS auth key of the server you chose in step 2. Use a text editor to open the CA certificate file and copy the contents to the “CA Cert” field. Do the same for the TLS auth key and copy its contents to the “TLS Auth Key” field.
8. Click the “Save” and “Apply Settings” buttons to confirm the configurations.
9. Once you confirm the connection is active, you can connect your Apple TV to the router. You can confirm by going to the “Status” tab at the top of the screen, then selecting the “OpenVPN” tab.
Get Surfshark for your Apple TV
Why Should You Use Surfshark for Apple TV?
Here are two reasons you should consider using Surfshark on your Apple TV:
1. Security and Privacy
Surfshark’s primary directive is to protect devices from the risks of external cyber threats. It does this by using military-grade encryption, DNS/IPv6, WebRTC leak protection, perfect forward secrecy, an automatic Kill Switch, MultiHop servers, CleanWeb (an ad and malware blocker), and secure protocols such as OpenVPN. Other additional features like Surfshark Alert and Surfshark Search help check if your private information is in leaked databases and maintain anonymity.
2. Access Geo-Restricted Content
While protection is crucial, the main goal of several VPN users is to access geo-restricted content. For example, depending on your region, you might not have access to certain Apple TV shows. Using Surfshark permits you to take a virtual trip to 65 different countries so you can access their Apple TV catalog.
Frequently Asked Questions on Setting Up and Using Surfshark on Apple TV
Will Surfshark keep my connection to Apple TV secure?
Yes, Surfshark will always protect your connection to Apple TV. Surfshark is among the top VPNs with security components that will keep you safe. It uses military-grade encryption combined with perfect forward secrecy to make your connection impermeable. In addition, secure VPN protocols such as WireGuard, OpenVPN, and IKEv2. Plus, it has an automatic kill switch and other secure modes that provide excellent security and privacy.
Can I use Surfshark 0n other Apple devices at the same time as Apple TV?
Yes, you can use Surfshark on other Apple devices at the same time as Apple TV. Unlike most VPN services, Surfshark has no limit on the number of simultaneous connections a single user account can have. As a result, you can connect to as many Apple devices as you want with your Surfshark account.
Will using Surfshark on Apple TV affect my streaming quality?
Using Surfshark on Apple TV will likely have some effect on your streaming quality. VPNs generally reduce your connection speed and affect streaming quality. However, top VPNs like Surfshark usually maintain the quality of your connection; you won’t notice any quality reductions.
It is vital to note that your streaming quality mainly depends on your internet quality. If you have a poor internet connection, the speed reduction that comes with a VPN might be noticeable. On the other hand, using Surfshark on a high-quality internet connection is unlikely to give you any issues. Furthermore, Surfshark can improve your streaming quality if your ISP throttles your internet.
Is it legal to use Surfshark on Apple TV?
Yes, it is usually legal to use Surfshark on Apple TV. There might be some cases where it’s unclear if it is legal to use a VPN, such as in countries that ban VPNs. For example, China has forbidden several VPN service providers, but no Chinese law says it is illegal to use a VPN in China. So, you’ll have no problems using Surfshark on Apple TV in many countries worldwide.
Conclusion
Surfshark is an affordable VPN package with premium features. Whether you’re looking to protect your internet connection or access the Apple TV library of other regions, Surfshark is well equipped to serve you. We hope this article guides you in setting up Surfshark on your Apple TV.
Related Posts
- SurfShark Review (2026)
- Surfshark Coupon and Discount Code 2026 | Get [provider_information provider_name="surfshark - en" information="save 2y"] Off Surfshark
- Best Alternatives to SurfShark for July, 2026
- Surfshark Black Friday 2025: Save Big on Privacy, Speed & Streaming
- Surfshark Price: How Much Surfshark Costs in 2026
- Surfshark CleanWeb: How It Compares to Other VPN Ad Blockers
- Setup and use Surfshark on PS5
- Setup and Use Surfshark on Firestick TV
- Setup and use SurfShark on PS4
- Surfshark for Netflix: Does it Work & How Good Is It in 2026?